
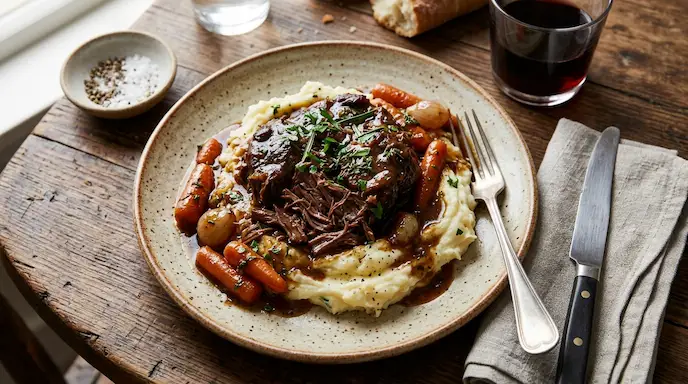
Fall-off-the-bone tender beef shank, braised low and slow in a rich, savory gravy. A comforting dinner that’s easier than it looks.
- Prep Time: 20 minutes
- Cook Time: 3 hours 30 minutes
- Total Time: 3 hours 50 minutes
- Servings: 4
- Calories: About 520 per serving
Introduction
This beef shank recipe turns one of the toughest cuts of beef into one of the most tender. Beef shank comes from the leg, so it’s packed with connective tissue and collagen. That sounds like a problem, but it’s actually the secret. Slow cooking melts that collagen into gelatin, leaving the meat soft enough to pull apart with a fork. Along the way, the bone marrow and connective tissue enrich the cooking liquid, turning it into a deeply savory gravy, much like a good meat sauce recipe builds flavor over time. This dish takes patience, not skill, which makes it a great choice for a relaxed Sunday family dinner.
Table of Contents
Why You’ll Love This Recipe
- Deep beef flavor. Searing the shanks first builds a browned crust that flavors the whole pot.
- Fork-tender texture. Hours of slow cooking break down tough connective tissue completely.
- Rich cooking liquid. Collagen and marrow turn the braising liquid into a silky, savory gravy.
- Simple prep. Just a handful of vegetables, herbs, and a good sear.
- Comfort food classic. Warm, hearty, and satisfying on a cold night.
- Great leftovers. The flavor gets even better the next day.
Before You Start
A few small steps make a big difference with beef shank.
Pat the meat dry. Moisture on the surface stops the beef from browning properly. A dry surface sears instead of steams.
Trim only the excess fat. Leave a thin layer for flavor, but remove large silvery patches that won’t render down.
Season generously. Beef shank is a large cut, so it needs enough salt and pepper to season all the way through.
Chop vegetables evenly. Even pieces cook at the same rate and break down into the gravy smoothly.
Measure the liquid ahead. Beef shank needs enough liquid to stay submerged for hours, but not so much that the gravy turns watery.
Preheat the oven. A steady temperature is what makes the connective tissue melt evenly.
Recipe Success Checklist
- ✓ Beef shanks are patted dry
- ✓ Excess fat is trimmed
- ✓ Seasoning is measured and ready
- ✓ Vegetables are evenly chopped
- ✓ Garlic and herbs are prepped
- ✓ Cooking liquid is measured
- ✓ Dutch oven or heavy pot is ready
- ✓ Oven is preheated to the correct temperature
- ✓ Meat is checked for tenderness before serving
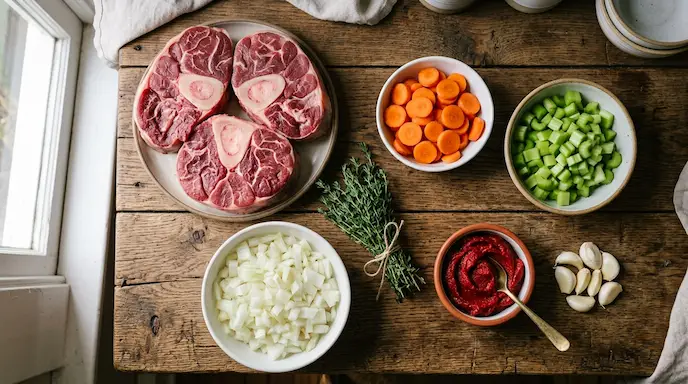
Ingredients
- 4 bone-in beef shanks (about 1 to 1.5 pounds each, 1.5 to 2 inches thick)
- 1 teaspoon kosher salt, plus more to taste
- 1/2 teaspoon black pepper
- 1/4 cup all-purpose flour, for dredging
- 3 tablespoons olive oil
- 1 large yellow onion, diced
- 2 medium carrots, sliced into rounds
- 2 celery stalks, sliced
- 4 garlic cloves, minced
- 2 tablespoons tomato paste
- 1 cup dry red wine (or extra beef broth)
- 3 cups beef broth
- 1 tablespoon Worcestershire sauce
- 2 bay leaves
- 3 sprigs fresh thyme (or 1 teaspoon dried thyme)
- 2 tablespoons fresh parsley, chopped, for garnish
Ingredient Notes
Beef shank. This cut comes from the leg and contains a marrow-filled bone plus a good amount of connective tissue. That tissue is what gives the finished dish its rich, gelatin-like texture. Look for shanks with visible marbling and a solid meat-to-bone ratio.
Onion, carrots, and celery. This trio forms the flavor base. As they cook down over several hours, they soften completely and add natural sweetness to balance the savory beef.
Garlic. Adds a sharp, savory note that mellows and deepens during the long cook time.
Tomato paste. Adds concentrated umami and a touch of acidity that keeps the gravy from tasting flat.
Beef broth. The main cooking liquid. Choose a low-sodium broth so you can control the final saltiness after the liquid reduces.
Red wine. Optional but recommended. It adds acidity and depth. If you skip it, use extra beef broth instead.
Herbs (thyme and bay leaf). These infuse the liquid slowly without overpowering the beef flavor.
Cooking fat (olive oil). Needed to get a proper sear before braising. Avoid low-smoke-point oils, since the pan needs to stay hot.
Choosing the Best Beef Shank
Bone-in beef shank is the best choice for this recipe. The bone holds marrow, which melts into the cooking liquid and adds body and flavor you can’t get from boneless meat alone. Look for shanks that are cut evenly, about 1.5 to 2 inches thick, with a good amount of meat around the bone. A little marbling throughout the meat helps keep it moist during the long cook time. Fresh shanks should be a deep red color without any gray patches or a strong odor. If your butcher offers both cross-cut and whole shanks, cross-cut pieces cook a bit more evenly since the thickness is more consistent.
Why Beef Shank Needs Slow Cooking
Beef shank comes from a hard-working muscle in the leg. That means it’s full of collagen, a tough protein that holds muscle fibers together. At high heat, collagen stays firm, and the meat turns chewy and hard to eat. But when beef shank cooks slowly at a low, steady temperature, that same collagen breaks down into gelatin. Gelatin is soft, silky, and gives the meat its signature fall-apart texture. This transformation takes time, usually a few hours, so there’s no shortcut. Cooking beef shank quickly at high heat will always leave it tough, no matter how good the seasoning is. Patience is the real ingredient here.
Kitchen Equipment
- Dutch oven or other heavy, oven-safe pot with a lid
- Chef’s knife
- Cutting board
- Measuring cups and spoons
- Tongs
- Wooden spoon
- Meat thermometer (optional, for checking doneness)
Step-by-Step Instructions
1. Prepare the Beef Shanks
What To Do: Rest the shanks at room temperature 20 to 30 minutes, pat dry, and trim large patches of excess fat.
Why It Matters: A dry surface browns instead of steaming.
Visual/Texture Cues: The surface should look matte, not wet.
Timing: About 5 minutes.
Helpful Tip: Room-temperature meat sears more evenly.
What To Look For: Dry, trimmed shanks ready for seasoning.
2. Season the Meat
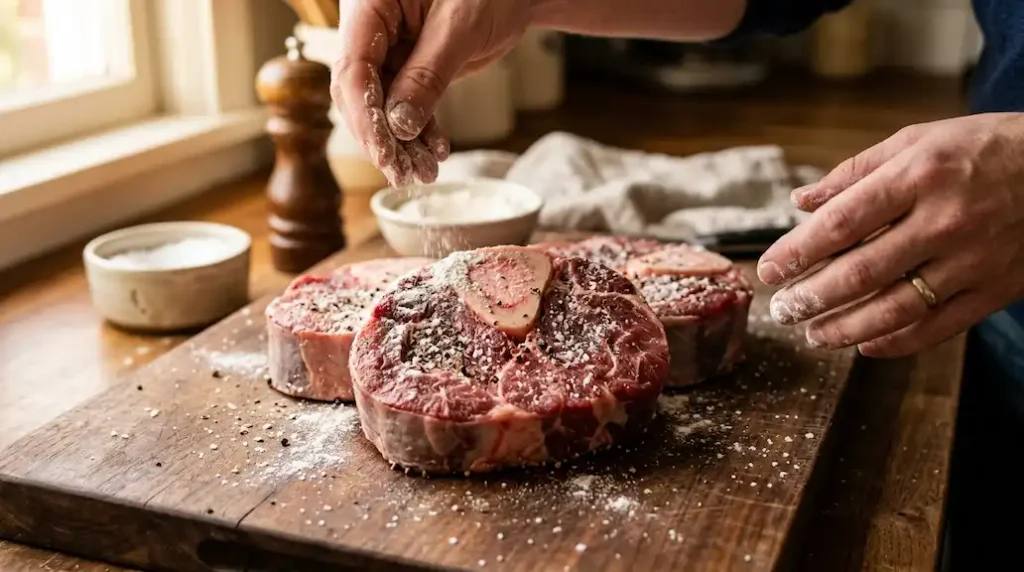
What To Do: Season both sides with salt and pepper, then dredge lightly in flour, shaking off the excess.
Why It Matters: Salt seasons the meat through the long cook; flour helps browning and later thickens the gravy.
Visual/Texture Cues: A thin, even flour coating with no thick clumps.
Timing: About 5 minutes.
Helpful Tip: Don’t skip the flour dredge; it noticeably improves the gravy.
What To Look For: Lightly coated shanks ready to sear.
3. Sear the Beef
What To Do: Heat olive oil in a Dutch oven until shimmering. Sear shanks in a single layer, 3 to 4 minutes per side, until deeply browned.
Why It Matters: Browning builds flavor and leaves fond that becomes the base of the gravy.
Visual/Texture Cues: A deep golden-brown crust; meat releases easily once seared.
Timing: 8 to 10 minutes total, in batches.
Helpful Tip: Sear in batches so the pan stays hot; crowding causes steaming instead of browning.
What To Look For: A dark crust and a browned, sticky layer on the pot bottom.
4. Prepare the Onions and Aromatics
What To Do: Remove the shanks. In the same pot, cook onion, carrots, and celery 5 to 6 minutes until softened, then add garlic for 30 seconds.
Why It Matters: The vegetables pick up the browned bits left from searing.
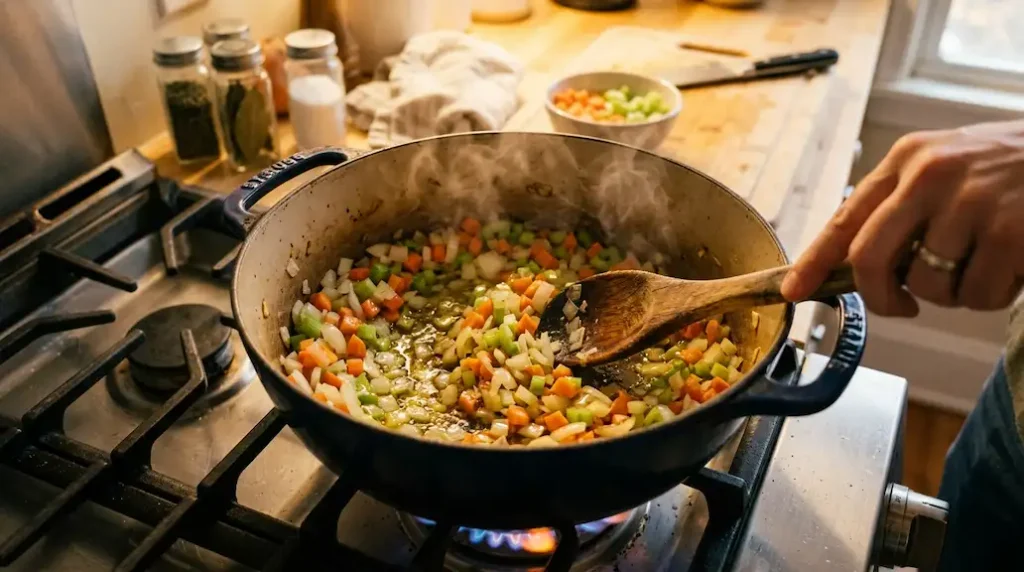
Visual/Texture Cues: Onions turn translucent and garlic becomes fragrant.
Timing: About 6 minutes.
Helpful Tip: Scrape the pot bottom as the vegetables cook to release the fond.
What To Look For: Softened vegetables with no raw garlic smell.
5. Build the Flavor Base
What To Do: Stir in the tomato paste and cook 1 to 2 minutes until it darkens slightly.
Why It Matters: Briefly cooking tomato paste removes its raw taste and deepens its umami.
Visual/Texture Cues: The paste turns a slightly darker brick-red.
Timing: 1 to 2 minutes.
Helpful Tip: Stir constantly so it doesn’t scorch.
What To Look For: A fragrant, slightly caramelized smell.
6. Add the Cooking Liquid
What To Do: Pour in the red wine, scrape up browned bits, and simmer 2 minutes. Add the beef broth and Worcestershire sauce.
Why It Matters: Deglazing releases flavor stuck to the pot, and the broth becomes the base of the gravy.
Timing: 3 to 4 minutes.
Helpful Tip: If skipping wine, use extra broth to deglaze.
What To Look For: A smooth liquid with no stuck bits on the pot bottom.
7. Return the Beef to the Pot
What To Do: Nestle the shanks back in with their juices. Liquid should reach about two-thirds up the sides of the meat.
Why It Matters: Partial submersion lets the top caramelize slightly while the rest braises tender.
Timing: 2 minutes.
Helpful Tip: Add more broth if the shanks aren’t at least half-covered.
What To Look For: Shanks mostly submerged, with a bit of meat above the liquid.
8. Add Herbs and Seasonings
What To Do: Tuck the bay leaves and thyme sprigs into the liquid.
Why It Matters: Whole herbs infuse gently over the long cook without turning bitter.
Timing: 1 minute.
Helpful Tip: Remove herbs before serving.
What To Look For: Herbs fully submerged.
9. Slow Cook Until Tender
What To Do: Cover and transfer to a 325°F oven. Braise 3 to 3.5 hours, until fork-tender.
Why It Matters: This is when collagen slowly converts into gelatin, giving the beef its tender texture.
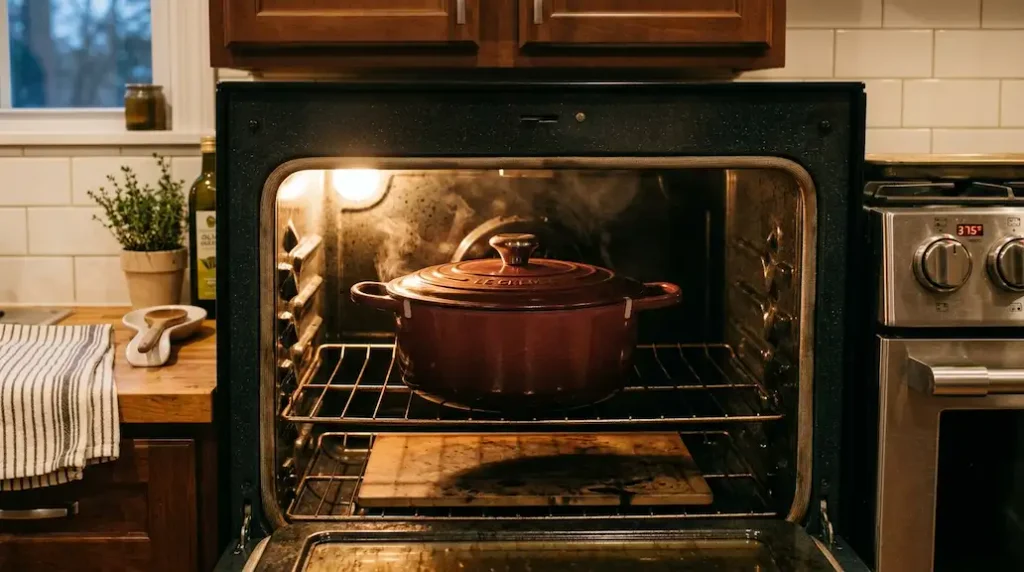
Visual/Texture Cues: Meat pulls away easily from the bone; a fork slides in with almost no resistance.
Timing: 3 to 3.5 hours.
Helpful Tip: Avoid opening the lid often; each peek lets out heat and adds cooking time.
What To Look For: Meat that shreds easily under light pressure.
10. Check Tenderness
What To Do: After 3 hours, check one shank with a fork. If it resists, cover and cook 20 to 30 minutes longer.
Why It Matters: Shank thickness varies, so cook times shift slightly between batches.
Timing: 5 minutes to check, plus extra if needed.
Helpful Tip: Internal temperature should be well above 195°F, since shank needs to pass simple doneness to become tender.
What To Look For: Meat that separates easily with light pressure.
11. Remove and Rest the Beef
What To Do: Lift the shanks onto a plate and rest 10 minutes.
Why It Matters: Resting lets juices redistribute so the meat stays moist.
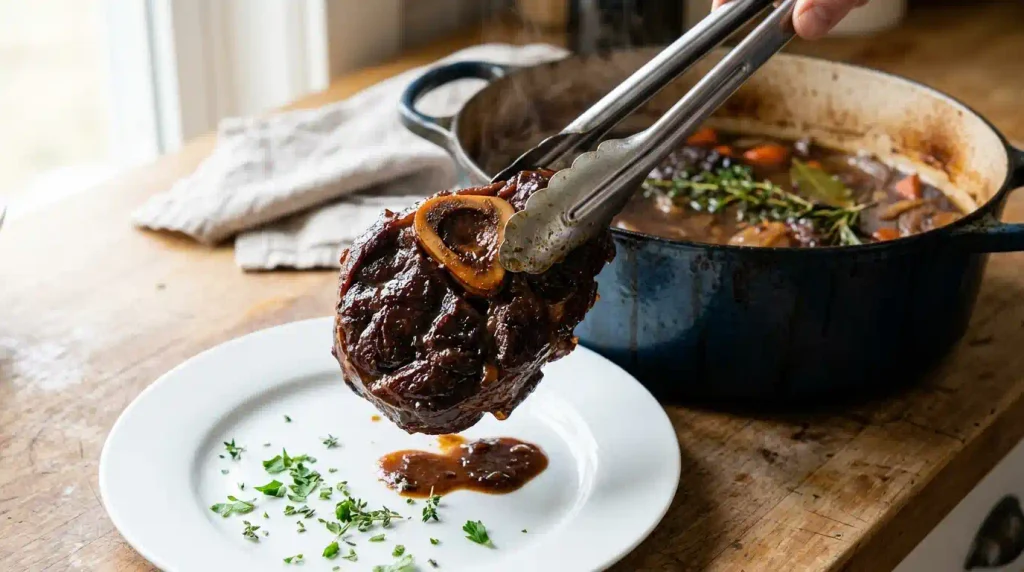
Timing: 10 minutes.
Helpful Tip: Tent loosely with foil to keep warm.
What To Look For: Meat that holds its shape but is clearly soft.
12. Finish the Cooking Liquid
What To Do: Discard the herbs, skim excess fat, and simmer the liquid 5 to 10 minutes to thicken.
Why It Matters: Reducing concentrates flavor and thickens the gelatin-rich liquid into gravy.
Visual/Texture Cues: The liquid coats the back of a spoon.
Timing: 5 to 10 minutes.
Helpful Tip: Taste and adjust seasoning after reducing.
What To Look For: A glossy, savory gravy with good body.
13. Serve
What To Do: Warm the shanks through in the gravy, or spoon gravy over the plated beef. Garnish with parsley.
Why It Matters: Coating the meat right before serving keeps every bite moist.
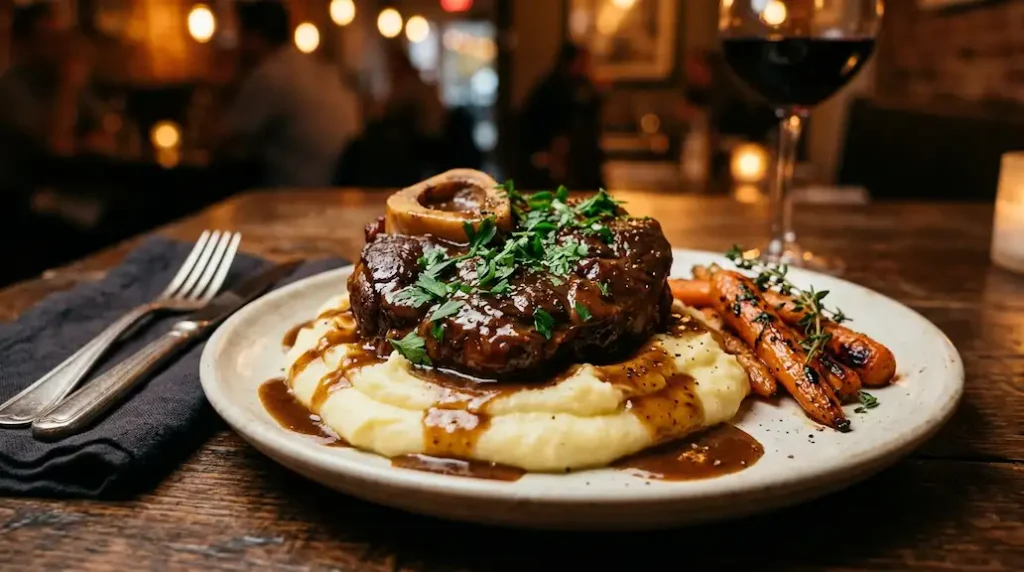
Timing: 5 minutes.
Helpful Tip: Serve over mashed potatoes, rice, or egg noodles to soak up extra gravy.
What To Look For: Glossy, tender beef fully coated in gravy.
Searing the Beef
Searing matters because it builds the base flavor for the entire dish. Start with completely dry meat, since any surface moisture will cause steaming instead of browning. Use a hot pan and avoid crowding it; if the shanks are too close together, they’ll trap steam and never develop a proper crust. A deep golden-brown color, not gray, is the sign of good browning. That browned layer, called fond, sticks to the bottom of the pot and dissolves into the cooking liquid later, adding a roasted depth you can’t get any other way.
Building the Savory Cooking Liquid
The cooking liquid does most of the work in this recipe. Beef broth forms the base, while the sautéed onion, carrot, and celery add sweetness and body. Garlic and tomato paste bring sharpness and umami, and the browned fond from searing adds roasted depth. As the shanks braise, marrow and collagen slowly release into the liquid, thickening it naturally and giving it a silky texture. By the time the beef is tender, the liquid has transformed from a thin broth into a rich, savory gravy.
Why This Recipe Works
Beef shank is built for slow cooking. Its structure, dense muscle wrapped in connective tissue, needs low, steady heat over several hours to become tender. Searing first locks in flavor and starts the browning process. The aromatics and cooking liquid add moisture and seasoning throughout the cook, while the enclosed pot traps steam and keeps the meat from drying out. Together, these steps turn a tough, inexpensive cut into a rich, satisfying meal.
Recipe Science
Beef shank is high in collagen, a connective protein found in muscle sheaths and tendons. When collagen is heated slowly in liquid, above roughly 160°F for an extended time, it breaks down into gelatin. Gelatin is soft and dissolves easily, which is why long-braised beef shank falls apart with a fork instead of staying chewy. Browning the meat first triggers the Maillard reaction, a chemical process that creates hundreds of new flavor compounds on the surface. The gelatin released during cooking also thickens the braising liquid naturally, giving the finished gravy its body without needing a separate thickener. Resting the meat briefly after cooking allows juices to settle back into the fibers instead of running out when sliced.
Expert Tips
- Choose shanks with a good meat-to-bone ratio for the best yield.
- Season generously; this is a large cut that needs enough salt to flavor it through.
- Don’t skip the flour dredge. It helps both browning and gravy thickness.
- Sear in batches so the pot stays hot enough to brown properly.
- Keep the oven temperature steady at 325°F for even, gentle cooking.
- Check tenderness with a fork, not a clock. Thickness varies between shanks.
- Keep the liquid at about two-thirds up the meat, not fully submerged.
- Skim excess fat from the liquid before reducing it into gravy.
- Let the beef rest before serving so the juices redistribute.
- Remove bay leaves and thyme stems before serving.
- Save the bones after eating; they make excellent stock.
- Make it a day ahead. The flavor improves overnight in the refrigerator.
Common Mistakes
Cooking too quickly. High heat leaves the collagen tough. Stick to a low, steady oven temperature.
Cutting the cook time short. Beef shank needs a full 3 to 3.5 hours. Pulling it early leaves it chewy.
Skipping the sear. Browning builds flavor that can’t be replaced later in the cooking process.
Adding too much liquid. Fully submerging the meat dilutes the flavor and waters down the gravy.
Under-seasoning. A large cut needs enough salt to season all the way through during the long cook.
Slicing before it’s tender. Cutting into the meat too early releases juices and leaves it dry.
Overcrowding the pot. This causes steaming instead of browning during the sear.
Overcooking the vegetables. If you plan to serve them, add fresh vegetables near the end so they don’t turn mushy.
Troubleshooting
Why is my beef shank still tough? It likely needs more time. Cover and continue cooking in 20-minute increments until it shreds easily.
Why is the meat dry? This usually happens from overcooking without enough liquid, or slicing before resting. Keep the shanks submerged and let them rest before serving.
Why is the cooking liquid too thin? Simmer it uncovered on the stovetop for a few extra minutes to reduce and thicken naturally.
Why is the cooking liquid too salty? Add a splash of water or unsalted broth to balance it out, then taste again before serving.
Why isn’t the beef flavorful? This usually points to a skipped sear or under-seasoning. Both steps build the base flavor.
Why isn’t the beef falling apart? It needs more time at a low, steady temperature. Tenderness comes from the collagen fully breaking down.
Why are the vegetables mushy? They cooked the entire time. Next time, add a fresh batch of vegetables in the last 30 minutes if you want to serve them alongside the beef.
How can I improve the sauce or gravy? Simmer it longer to reduce, or skim excess fat first for a cleaner, richer flavor.
Substitutions
Boneless beef shank. Works if bone-in isn’t available, though the gravy will have slightly less body from the missing marrow.
Beef chuck roast. A reasonable substitute with a similar texture, though cook time may be slightly shorter.
No wine. Replace with extra beef broth plus a small splash of red wine vinegar for acidity.
Dried herbs. Use 1 teaspoon dried thyme in place of fresh; the flavor is slightly more concentrated.
Gluten-free flour. A 1-to-1 gluten-free blend works fine for dredging.
Recipe Variations
Garlic herb beef shank. Double the garlic and add a sprig of rosemary along with the thyme.
Rich red wine beef shank. Increase the red wine to 1.5 cups and reduce the broth slightly for a deeper, wine-forward flavor.
Vegetable-heavy version. Add extra carrots, parsnips, or mushrooms for a heartier, more filling one-pot meal.
Tomato-rich version. Add a can of crushed tomatoes along with the broth for a heartier, slightly tangier sauce.
Serving Suggestions
- Creamy mashed potatoes
- Steamed white rice
- Buttered egg noodles
- Roasted root vegetables
- Simple sautéed green beans
- Crusty bread for soaking up the gravy
- A light green salad to balance the richness
Leftovers
Leftover beef shank is easy to repurpose. Shred the meat and pile it onto sandwiches with a little extra gravy, toss it into a rice bowl, stir it into pasta, or add it to a pot of vegetable soup. It also works well folded into tacos with a squeeze of lime.
Storage
Let the beef and gravy cool before storing. Refrigerate in an airtight container for up to 4 days. For longer storage, freeze the meat and gravy together in a freezer-safe container for up to 3 months. Cooling the food before sealing it helps prevent excess condensation and keeps the texture better over time.
Reheating
Reheat gently to avoid drying out the meat. On the stovetop, warm the beef in its gravy over low heat, adding a splash of broth if the sauce has thickened too much. In the oven, cover with foil and heat at 300°F until warmed through. In the microwave, use short intervals and add a spoonful of gravy or broth before heating to keep the meat moist.
Make-Ahead
Several parts of this recipe can be done ahead. Chop the onion, carrots, and celery up to a day in advance and store them in the refrigerator. The full dish can also be braised a day ahead; the flavor actually deepens overnight. Simply refrigerate the finished beef shank and gravy, then reheat gently before serving.
Frequently Asked Questions
What is beef shank best used for?
Beef shank is best for slow, moist cooking methods like braising, since its connective tissue needs time to break down into tender gelatin.
Why is my beef shank still tough?
It usually needs more time. Continue cooking in short increments until a fork slides in easily.
How long does beef shank take to become tender?
Most bone-in beef shanks become fork-tender after about 3 to 3.5 hours of slow braising at 325°F.
Should I sear beef shank before slow cooking?
Yes. Searing builds a browned crust that adds significant flavor to the finished dish.
Can I make beef shank in a crockpot?
Yes, this method also works well as a beef in a crockpot recipe. Sear the meat first, then transfer everything to a slow cooker on low for 7 to 8 hours.
What is the best liquid for beef shank?
A combination of beef broth and a splash of red wine builds the most balanced, savory flavor.
Can I freeze cooked beef shank?
Yes. Freeze the meat and gravy together in an airtight container for up to 3 months.
How long does beef shank last in the refrigerator?
Cooked beef shank keeps well in the refrigerator for up to 4 days when stored in an airtight container.
What is the best way to reheat beef shank?
Reheat it gently on the stovetop or in the oven with a little extra gravy or broth to keep it moist.
What sides go well with beef shank?
Mashed potatoes, rice, egg noodles, and roasted vegetables all pair well, since they soak up the rich gravy nicely.
Final Thoughts
This beef shank recipe proves that a tough, budget-friendly cut can turn into one of the most tender, satisfying meals you’ll make all week. Give the beef the time it needs, and the collagen does the rest of the work for you. Serve it with your favorite sides, and don’t be surprised if this becomes a regular part of your dinner rotation.
For general guidance on safe beef handling and minimum internal cooking temperatures, see the USDA’s food safety guidelines.