
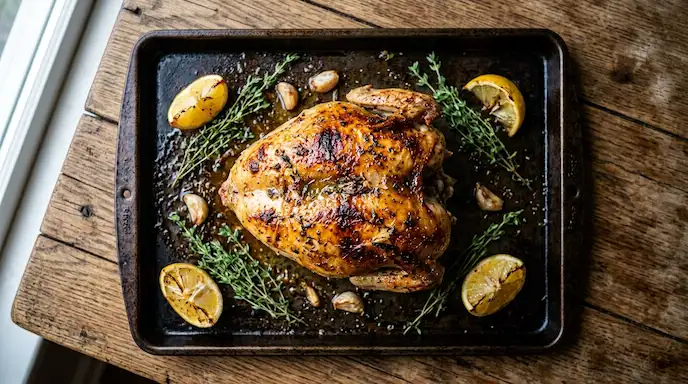
This oven baked bone-in chicken breast recipe turns a handful of pantry staples into a juicy, crispy-skinned dinner with almost no hands-on work.
- Prep Time: 10 minutes
- Cook Time: 40 minutes
- Total Time: 50 minutes
- Servings: 4
- Estimated Calories: 420 per serving
What makes this recipe worth adding to your weeknight rotation is simple: it uses one pan, one oven temperature, and ingredients you likely already have. The bone keeps the meat moist while it bakes, and a few key techniques give you skin that actually shatters when you bite into it — no deep frying required.
Introduction
If you’ve ever bitten into dry, rubbery chicken breast, this bone in chicken breast recipe is going to change how you think about baking chicken at home. Cooking chicken breast with the bone still attached does two important things: it insulates the meat so it cooks more evenly, and it adds richer flavor as the chicken roasts. The skin, when prepped correctly, crisps up beautifully in a hot oven without any special equipment.
You’ll end up with a dinner that looks like it came from a restaurant kitchen but takes less than an hour start to finish. It’s also a great way to build extra protein for the week — leftovers work perfectly in a shredded chicken recipe for tacos, soups, or salads. This method is forgiving, budget-friendly, and ideal for busy weeknights when you still want something that feels like a real meal.
Table of Contents
Why You’ll Love This Recipe
- Crisp, shatter-worthy skin — a dry brine and high heat do the heavy lifting.
- Juicy meat every time — the bone protects the breast from drying out.
- Just a handful of ingredients — no complicated marinade or brining process required.
- One pan, minimal cleanup — everything bakes on a single sheet pan.
- Reliable timing — this method works consistently across different oven types.
- Weeknight-friendly — 10 minutes of prep is all it takes before the oven does the work.
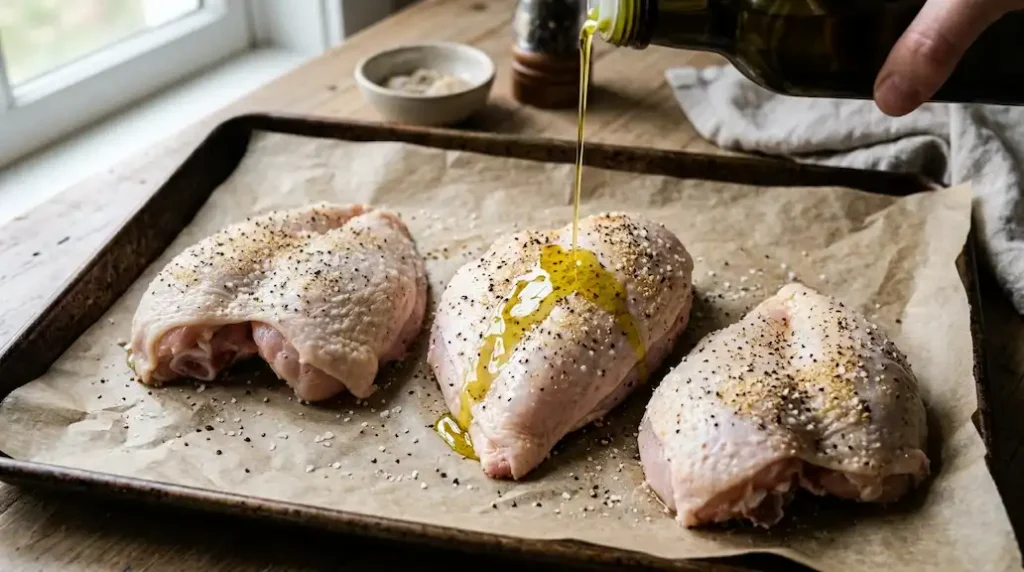
Before You Start
A few small steps before the chicken hits the oven make a big difference in the final result.
Pat the chicken completely dry. Any surface moisture turns to steam in the oven, and steam is the enemy of crispy skin. Use paper towels and press firmly, including under any skin folds.
Let the chicken sit at room temperature for 15–20 minutes. Cold chicken straight from the fridge cooks unevenly, with the outside finishing before the center reaches a safe temperature.
Season evenly, including under the skin. Gently loosen the skin with your fingers and rub seasoning directly onto the meat. This builds flavor all the way through, not just on the surface.
Preheat the oven fully before adding the chicken. An oven that hasn’t reached temperature will cause the chicken to steam instead of roast, especially in the first 10 minutes.
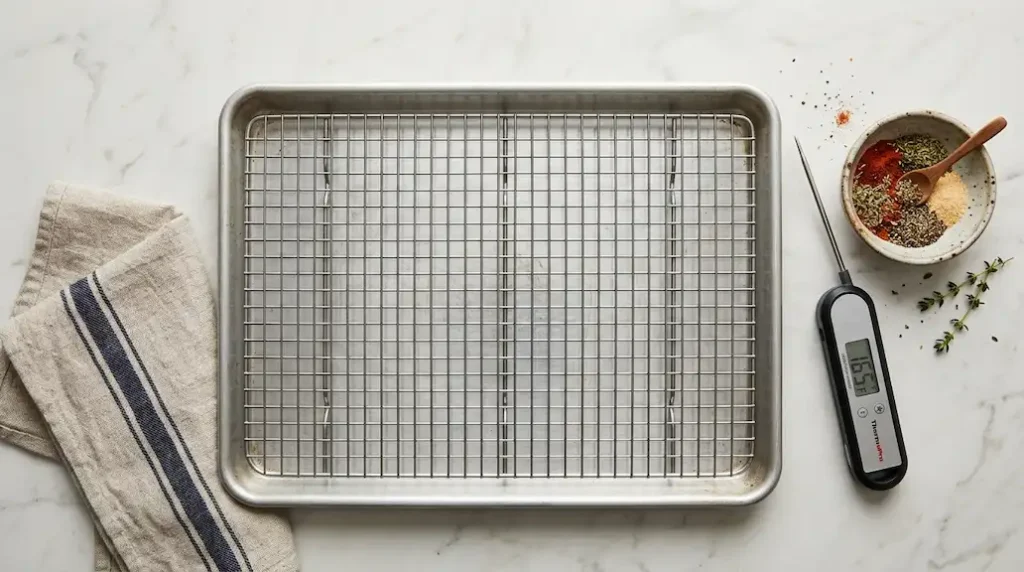
Use a wire rack over a baking sheet if you have one. This lets hot air circulate under the chicken, so the skin crisps on all sides instead of steaming against the pan.
Recipe Success Checklist
✓ Chicken is thoroughly patted dry, including under the skin ✓ Chicken has rested at room temperature for 15–20 minutes ✓ Oven is fully preheated to 425°F ✓ Seasoning is distributed evenly, above and below the skin ✓ Chicken breasts are spaced apart, not touching ✓ Instant-read thermometer is on hand before baking begins
Ingredients
- 4 bone-in, skin-on chicken breasts (about 8–10 ounces each)
- 2 tablespoons olive oil
- 1½ teaspoons kosher salt
- ½ teaspoon black pepper
- 1 teaspoon garlic powder
- 1 teaspoon smoked paprika
- 1 teaspoon dried thyme (or 2 teaspoons fresh, chopped)
- Optional: 1 tablespoon melted butter, for extra richness
Ingredient Notes
Bone-in, skin-on chicken breasts are the foundation of this recipe. The bone slows and evens out the cooking, while the skin protects the meat and crisps into the star of the dish. Avoid boneless cuts here — they cook faster and dry out more easily.
Olive oil helps the seasoning stick and promotes even browning. A neutral oil like avocado oil works as a substitute if you prefer a milder flavor.
Kosher salt draws out surface moisture early, which helps the skin dry out and crisp later in the oven. Table salt can be used, but reduce the amount by about a third since it’s more concentrated.
Black pepper adds mild heat and depth without overpowering the chicken.
Garlic powder gives even, consistent flavor across the whole piece of chicken. Fresh garlic can burn at high oven heat, so powder is the safer choice here.
Smoked paprika adds color and a subtle smoky note that complements the crisp skin. Sweet paprika works if you prefer a milder flavor.
Dried thyme brings an earthy, savory background flavor. Rosemary or Italian seasoning are easy substitutes.
Choosing the Best Bone-In Chicken Breast
Look for chicken breasts that are similar in size — this helps everything finish cooking at the same time. Breasts in the 8–10 ounce range bake most predictably in about 35–40 minutes.
Check the skin: it should look intact, pale pink, and free of tears. Torn or missing skin won’t crisp evenly and can leave parts of the meat exposed to direct heat, which dries it out faster.
Bone-in, skin-on is the right choice for this recipe. Boneless breasts cook much faster and lack the skin needed for the crisp texture the recipe is built around.
Fresh chicken is preferred for the most even texture, but frozen chicken works well too as long as it’s fully thawed and thoroughly dried before seasoning. Thaw it in the refrigerator overnight rather than on the counter.
Kitchen Equipment
- Rimmed baking sheet
- Wire rack (optional, but recommended for crisper skin)
- Instant-read thermometer
- Paper towels
- Mixing bowl for seasoning blend
Step-by-Step Instructions
Step 1: Prep the Chicken
What To Do: Remove chicken breasts from packaging and pat them completely dry with paper towels, inside and out, including under the skin.
Why It Matters: Any leftover moisture on the skin will steam in the oven and prevent proper browning.
Visual Cues: The skin should look matte, not glossy or wet.
Texture Cues: The skin should feel dry to the touch, not tacky.
Timing: About 3–5 minutes.
Helpful Tip: Let the patted-dry chicken rest uncovered on the counter for a few minutes while you prepare the seasoning — this allows even more surface moisture to evaporate.
What To Look For: Paper towels should come away with minimal moisture on the final pass.
Step 2: Season the Chicken
What To Do: Mix salt, pepper, garlic powder, smoked paprika, and thyme in a small bowl. Gently loosen the skin over each breast and rub about half the seasoning directly onto the meat. Rub the remaining seasoning and olive oil over the outside of the skin.
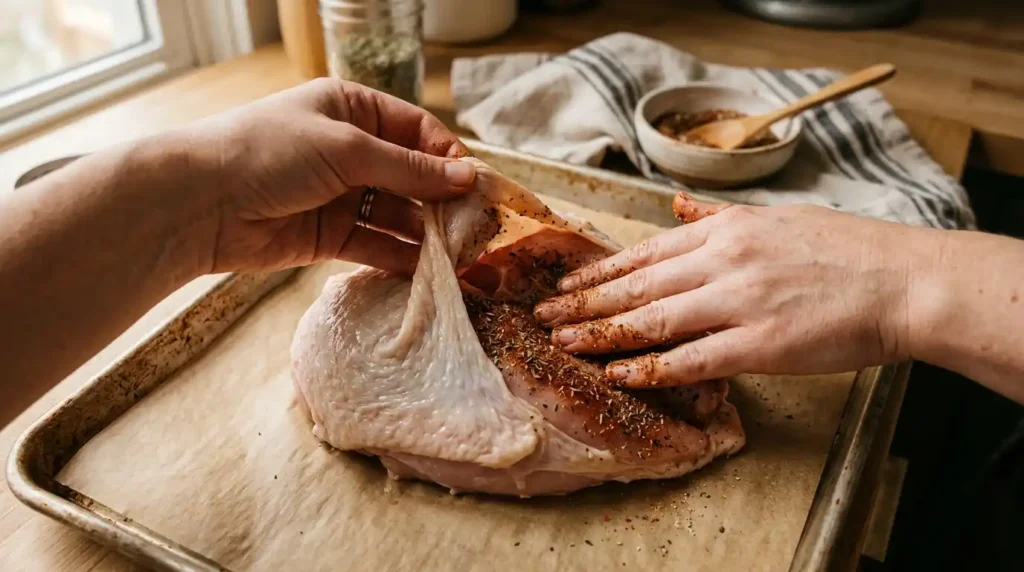
Why It Matters: Seasoning under the skin flavors the meat directly, since the skin itself acts as a barrier during cooking.
Visual Cues: Seasoning should be visible and evenly distributed, not clumped in one spot.
Texture Cues: The oil should coat the skin in a thin, even layer, not pooling.
Timing: About 5 minutes.
Helpful Tip: If the skin tears slightly while loosening it, that’s fine — just be gentle and avoid pulling too hard.
What To Look For: Every breast should look evenly coated with visible flecks of paprika and thyme.
Step 3: Arrange and Preheat
What To Do: Preheat the oven to 425°F. Place the seasoned chicken breasts skin-side up on a wire rack set inside a rimmed baking sheet, spaced at least 1 inch apart.
Why It Matters: Spacing allows hot air to circulate around each piece, which is essential for even browning. Crowding the pan traps steam and softens the skin.
Visual Cues: Chicken breasts should not touch each other or the edges of the pan.
Timing: Preheating typically takes 10–15 minutes.
Helpful Tip: If you don’t have a wire rack, use the baking sheet directly, but expect slightly less crisping on the bottom half of the skin.
What To Look For: The oven should register at full temperature before the pan goes in — most ovens have an indicator light or beep.
Step 4: Bake the Chicken
What To Do: Bake at 425°F for 35–40 minutes, without flipping or covering.
Why It Matters: Consistent, uncovered high heat is what drives off surface moisture and crisps the skin.
Visual Cues: Skin should turn from pale pink to deep golden brown, especially in the last 10 minutes.
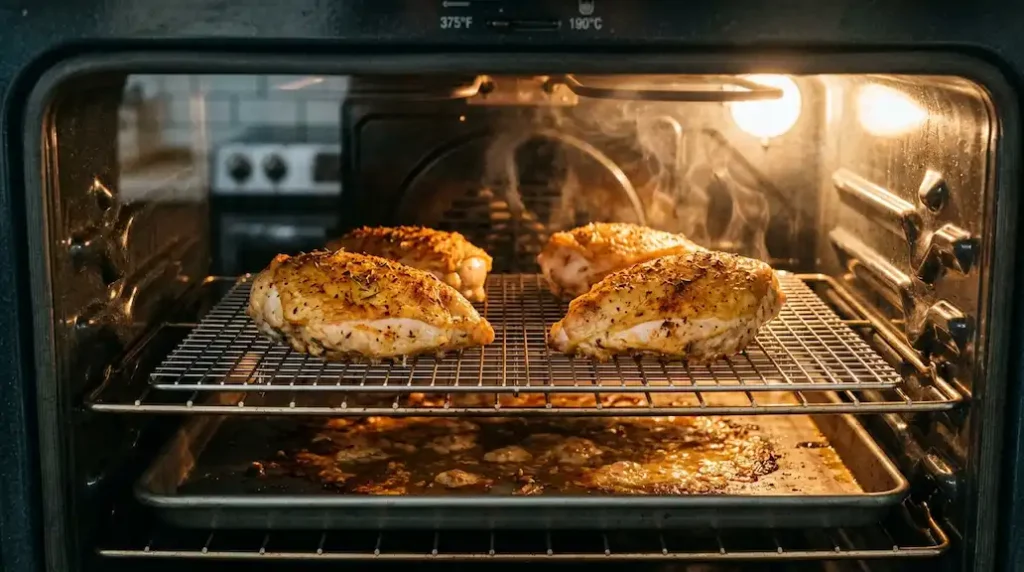
Texture Cues: The skin should look tight and slightly blistered, not soft or shiny.
Timing: 35–40 minutes for 8–10 ounce breasts; larger breasts may need up to 45 minutes.
Helpful Tip: Start checking internal temperature at the 30-minute mark, especially if your breasts are on the smaller side.
What To Look For: Juices should run clear when the thickest part is pierced, and the thermometer should read 165°F.
Step 5: Check for Doneness
What To Do: Insert an instant-read thermometer into the thickest part of the breast, avoiding the bone.
Why It Matters: Touching the bone gives a falsely high reading, since bone conducts heat differently than meat.
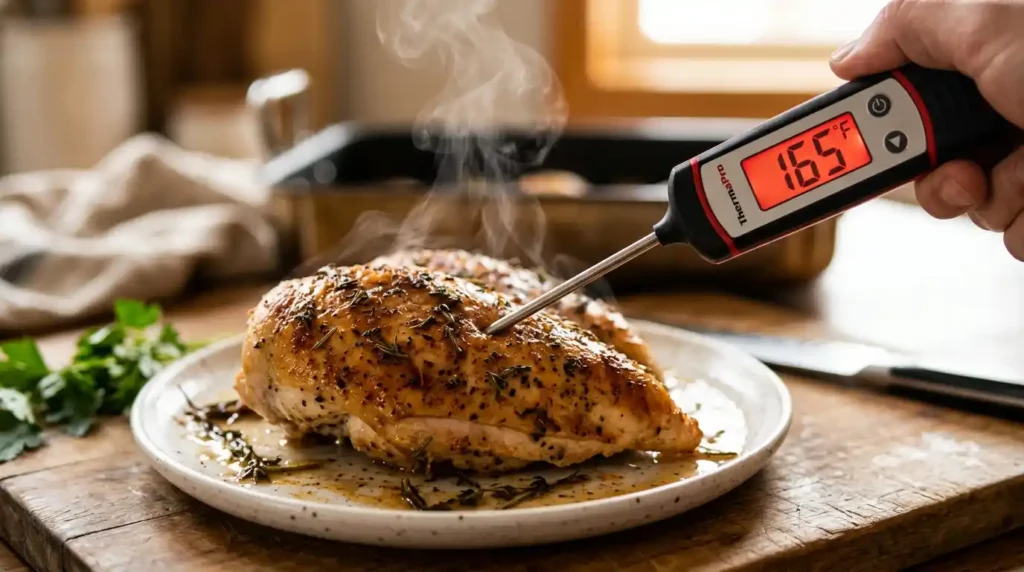
Visual Cues: The thermometer should stabilize within a few seconds.
Timing: Check starting around the 30-minute mark, then every 5 minutes after.
Helpful Tip: Check two or three breasts individually, since size differences mean they may finish at slightly different times.
What To Look For: A reading of 165°F confirms the chicken is fully cooked and safe to eat.
Step 6: Rest the Chicken
What To Do: Remove the chicken from the oven and let it rest on the pan for 5–10 minutes before slicing or serving.
Why It Matters: Resting allows the juices to redistribute through the meat instead of spilling out when cut.
Visual Cues: The skin should stay crisp during resting if the chicken isn’t covered.
Timing: 5–10 minutes.
Helpful Tip: Avoid covering the chicken with foil while it rests — trapped steam will soften the skin you just crisped.
What To Look For: Juices on the pan should look clear, not pink.
Crisp Skin Technique
Crisp skin comes down to controlling moisture and heat. Here’s what actually makes the difference:
Dry skin browns better because moisture has to evaporate before browning (the Maillard reaction) can happen. Every bit of surface water delays crisping.
Excess moisture prevents crisping — this is why patting the chicken dry, and letting it air-dry briefly, matters more than any specific seasoning choice.
Oil should be applied in a thin, even layer. Too much oil can pool and essentially fry the skin unevenly instead of roasting it, leading to soggy patches.
Seasoning should be distributed evenly so no one area is left bare while another is over-salted, which can pull excess moisture back to the surface.
Higher oven heat (425°F) helps the skin brown before the meat overcooks. Lower temperatures take longer, giving moisture more time to work against you.
Overcrowding the pan traps steam around the chicken, which softens the skin no matter how well you dried it beforehand.
A wire rack keeps the bottom of the skin from sitting in rendered fat and juices, which would otherwise steam that side of the chicken.
How to Know the Chicken Is Done
The only reliable way to confirm doneness is with an instant-read thermometer. Insert it into the thickest part of the breast, keeping it away from the bone, which conducts heat differently and can give an inaccurate reading. According to the U.S. Department of Agriculture, poultry is safe to eat once it reaches an internal temperature of 165°F.
Visual signs like clear juices and firm texture are helpful secondary indicators, but appearance alone isn’t a reliable food-safety measure — chicken can look done on the outside while still being underdone near the bone. Always confirm with a thermometer.
Resting the Chicken
Resting for 5–10 minutes after baking allows the muscle fibers to relax and reabsorb juices that would otherwise run out when you cut into the chicken right away. Skipping this step is one of the most common reasons baked chicken ends up drier than expected. Because the chicken isn’t covered during resting, the skin generally stays crisp rather than softening.
Why This Recipe Works
This recipe works because every step supports the same two goals: a dry, well-seasoned surface for crisping, and gentle, even cooking for juicy meat. The bone slows heat penetration into the center of the breast, which reduces the risk of overcooking the outer layers before the inside is done. The skin acts as a natural barrier, sealing in moisture while it crisps on the surface. High, consistent oven heat drives off surface moisture quickly, so the skin has time to brown before the meat dries out. Resting afterward locks in the juices the cooking process worked to preserve.
Recipe Science
Dry skin browns better because water has to fully evaporate before the sugars and proteins in the skin can caramelize and brown.
High heat speeds up crisping by accelerating moisture evaporation, giving you golden skin before the meat has a chance to overcook.
The bone acts as an insulator, slowing heat transfer to the center of the breast so the outer meat doesn’t dry out while the inside catches up.
Overcooking dries chicken because proteins tighten and squeeze out moisture the longer they’re exposed to heat past 165°F.
Resting improves texture by giving redistributed juices time to settle back into the muscle fibers instead of escaping onto the cutting board.
Expert Tips
- Buy chicken breasts of similar size so they finish cooking at the same time.
- Pat the chicken dry twice — once right after unpacking, and again just before seasoning.
- Don’t skip loosening the skin; seasoning the meat directly makes a real flavor difference.
- Use a wire rack whenever possible for all-around crisping.
- Preheat the oven fully before adding the chicken.
- Space chicken breasts at least 1 inch apart on the pan.
- Avoid opening the oven door repeatedly, which drops the temperature and slows browning.
- Always confirm doneness with a thermometer rather than guessing from color.
- Insert the thermometer away from the bone for an accurate reading.
- Let the chicken rest uncovered so the skin doesn’t soften from trapped steam.
- If the skin isn’t browning fast enough, move the pan to a higher oven rack for the last 5 minutes.
- Save the pan drippings — they make a quick, flavorful base for gravy or pan sauce.
Common Mistakes
Putting wet chicken in the oven leads to steamed, rubbery skin instead of crisp skin. Always pat dry thoroughly first.
Using too much oil can make the skin greasy rather than crisp. A thin, even coating is all you need.
Underseasoning leaves the chicken tasting flat, especially since the skin blocks some seasoning from reaching the meat. Season both under and over the skin.
Overcrowding the pan traps steam around the chicken and prevents even browning. Give each piece room to breathe.
Guessing doneness by appearance can lead to undercooked chicken near the bone or overcooked chicken elsewhere. Always use a thermometer.
Overcooking past 165°F dries out the meat, even with the bone helping to retain moisture. Pull the chicken as soon as it hits temperature.
Cutting immediately after baking releases the juices you worked to preserve. Always rest for at least 5 minutes.
Using different-sized chicken breasts without adjusting timing can mean smaller pieces overcook while larger ones are still underdone. Check each piece individually with a thermometer.
Troubleshooting
Why isn’t my chicken skin crispy? The most common cause is leftover surface moisture. Make sure the chicken is completely dry before seasoning, and use a wire rack so air can circulate underneath.
Why is my chicken breast dry? This usually means the chicken was cooked past 165°F, or it wasn’t rested before slicing. Pull the chicken as soon as it hits temperature and let it rest.
Why is the chicken still pink near the bone? This can happen even when the chicken is fully cooked, due to a natural reaction between bone marrow and oven heat. Always trust the thermometer reading over color near the bone.
Why is one chicken breast done before another? Size differences are the usual cause. Check each piece individually rather than assuming they’ll all finish at the same time.
Why didn’t the skin brown? Oven temperature may have been too low, or the pan may have been overcrowded. Confirm your oven is fully preheated and give each piece adequate spacing.
What can I do if the chicken is cooking too quickly? Loosely tent the thickest parts with foil to slow browning while the inside finishes cooking, then remove the foil for the last few minutes to re-crisp the skin.
Substitutions
Swapping bone-in for boneless chicken breast will significantly shorten cooking time, usually to around 20–25 minutes, and the meat won’t be as insulated, so it can dry out more easily. If you use skinless chicken, you’ll lose the crisp-skin element entirely and should add a bit more oil to prevent the surface from drying out. Butter can replace olive oil for a richer flavor, though it browns faster and needs closer watching in the final minutes.
For a milder-tasting alternative, you can also try this easy 4 ingredient chicken breast recipe, which uses a simpler seasoning approach for busy weeknights.
Variations
- Garlic Herb: Add 1 teaspoon dried rosemary and an extra ½ teaspoon garlic powder to the seasoning blend.
- Lemon Herb: Squeeze fresh lemon juice over the chicken in the last 5 minutes of baking, and add lemon zest to the seasoning mix.
- Paprika and Garlic: Increase smoked paprika to 2 teaspoons for a bolder, smokier flavor.
- Spicy Roasted Chicken: Add ½ teaspoon cayenne pepper or red pepper flakes to the seasoning blend.
- Italian-Inspired: Swap thyme for Italian seasoning and add a pinch of dried oregano.
If you prefer smaller portions or faster cooking, this thin sliced chicken breast recipe is a good alternative that uses the same seasoning approach with a shorter bake time.
Serving Suggestions
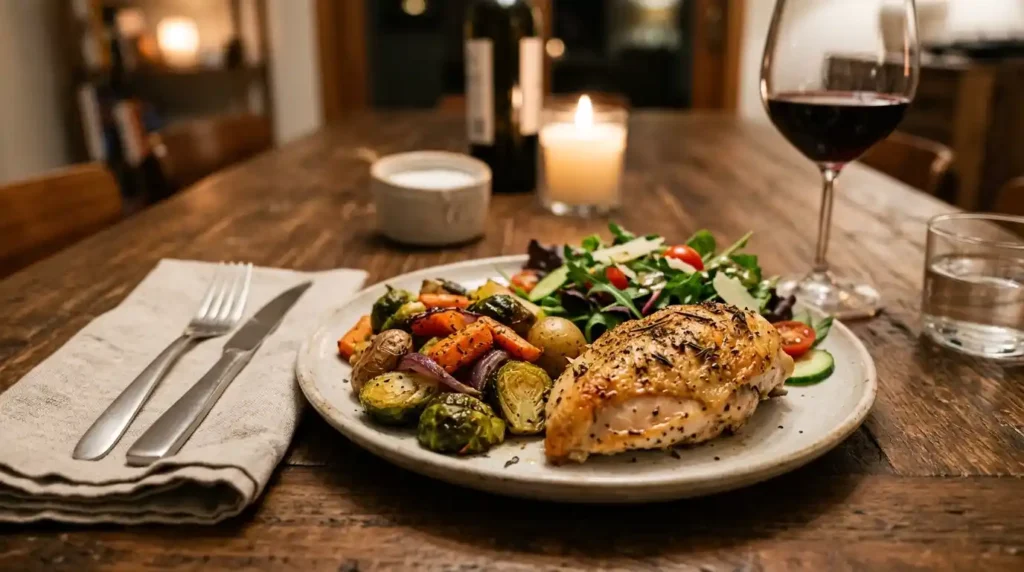
This chicken pairs well with simple, oven-friendly sides that can bake alongside it, like roasted potatoes or roasted seasonal vegetables. A light green salad with vinaigrette balances the richness of the crispy skin. For something heartier, serve it over rice or alongside a simple pasta tossed in olive oil and garlic. A basic pan sauce made from the drippings, chicken broth, and a splash of lemon juice adds extra flavor with very little effort. Iced tea or a light white wine like Sauvignon Blanc complements the dish well for dinner.
Storage
Let leftover chicken cool to room temperature before storing, but don’t leave it out longer than 2 hours. Store it in an airtight container in the refrigerator for up to 4 days. For longer storage, wrap pieces tightly in plastic wrap and place in a freezer-safe bag or container; frozen chicken keeps well for up to 3 months. Label containers with the date to keep track of freshness.
Reheating
To preserve as much crispness as possible, reheat chicken in the oven at 350°F for about 15 minutes, or until warmed through. An air fryer works well too, at 350°F for 6–8 minutes, and tends to bring back some of the original crispness in the skin. The microwave is the fastest option but will soften the skin significantly, so it’s best reserved for reheating shredded or chopped leftovers rather than whole pieces.
Make-Ahead
You can season the chicken up to 24 hours ahead of time and store it uncovered in the refrigerator, which actually helps dry out the skin further for even better crisping. Avoid fully baking the chicken ahead of time if you’re aiming for the crispiest skin, since reheating never fully restores the original texture. If make-ahead convenience matters more than peak crispness, fully baked chicken can be refrigerated and reheated using the method above.
FAQ
How long does bone-in chicken breast take to bake?
At 425°F, bone-in chicken breasts typically take 35–40 minutes, depending on size.
What temperature should bone-in chicken breast reach?
The chicken is safe to eat once it reaches an internal temperature of 165°F, measured in the thickest part of the meat.
How do I get crispy chicken skin?
Pat the chicken completely dry, apply a thin layer of oil, and bake uncovered at a high temperature with pieces spaced apart on the pan.
Should I cover bone-in chicken breast while baking?
No. Covering the chicken traps steam, which softens the skin and prevents browning.
How do I keep baked chicken breast juicy?
Cook just until the internal temperature reaches 165°F, then let it rest for 5–10 minutes before cutting.
Can I use frozen bone-in chicken breast?
Yes, as long as it’s fully thawed in the refrigerator first and thoroughly patted dry before seasoning.
Should I rest baked chicken breast?
Yes, resting for 5–10 minutes allows the juices to redistribute, resulting in a more tender bite.
Why is my chicken skin rubbery instead of crispy?
This is usually caused by leftover moisture on the skin or an oven that wasn’t fully preheated before baking.
Can I use this method for chicken thighs?
Yes, bone-in, skin-on thighs work with the same technique, though cooking time may vary slightly.
Final Thoughts
This oven baked bone-in chicken breast recipe proves that crisp skin and juicy meat don’t require anything complicated — just a few smart techniques and the right oven temperature. Whether you’re cooking a simple weeknight dinner or meal-prepping for the week ahead, this method delivers consistent, reliable results every time you make it.