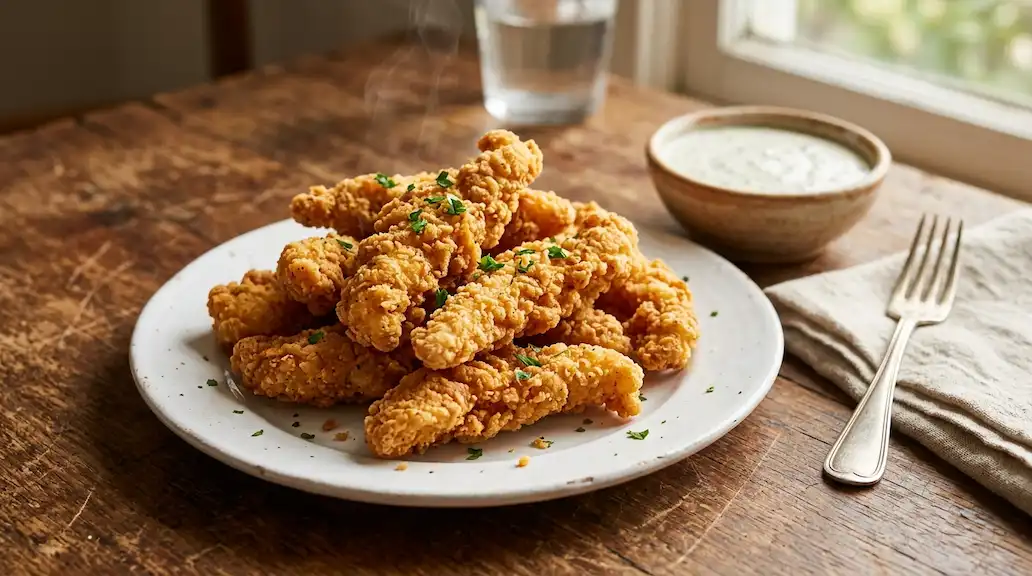
Crispy on the outside, juicy on the inside, and easy to dunk into your favorite sauce — that’s what makes homemade chicken fries so addictive.
Prep Time: 20 minutes | Cook Time: 15 minutes | Total Time: 35 minutes | Servings: 4 | Calories: approximately 380 per serving.
By the time you’re done, you’ll have a plate of golden, ultra-crunchy chicken strips with a seasoned coating that shatters with every bite, while the chicken underneath stays tender and juicy.
What Are Chicken Fries?
This fried chicken fries recipe turns boneless chicken into crispy, finger-shaped strips that are easier to dip and share than a traditional chicken tenders platter. The chicken is cut into thin, fry-like pieces, coated in a well-seasoned breading, and fried until deep golden brown. The result is a crunchy outer shell with tender, juicy chicken inside — the kind of texture that makes people go back for seconds.
If you already love our shredded chicken recipe, this is a fun way to use similar pantry staples in a completely different, handheld form. Chicken fries work as a quick lunch, an easy weeknight dinner, a party appetizer, or a game-day snack that disappears fast.
Table of Contents
Why You’ll Love This Recipe
- Shatteringly crispy coating: A seasoned flour-and-breadcrumb crust fries up crunchy and stays that way longer than most copycat versions.
- Tender, juicy center: Cutting the chicken into even strips means every piece cooks through without drying out.
- Easy to hold and dip: The fry shape is perfect for little hands, party trays, and dunking into sauce.
- Bold, balanced seasoning: Garlic, paprika, and black pepper flavor the coating all the way through, not just the surface.
- Family-friendly: Kids and adults both love the familiar shape and mild, savory flavor.
- Homemade quality: No drive-thru wait, and you control exactly what goes into the coating and the oil.
Before You Start
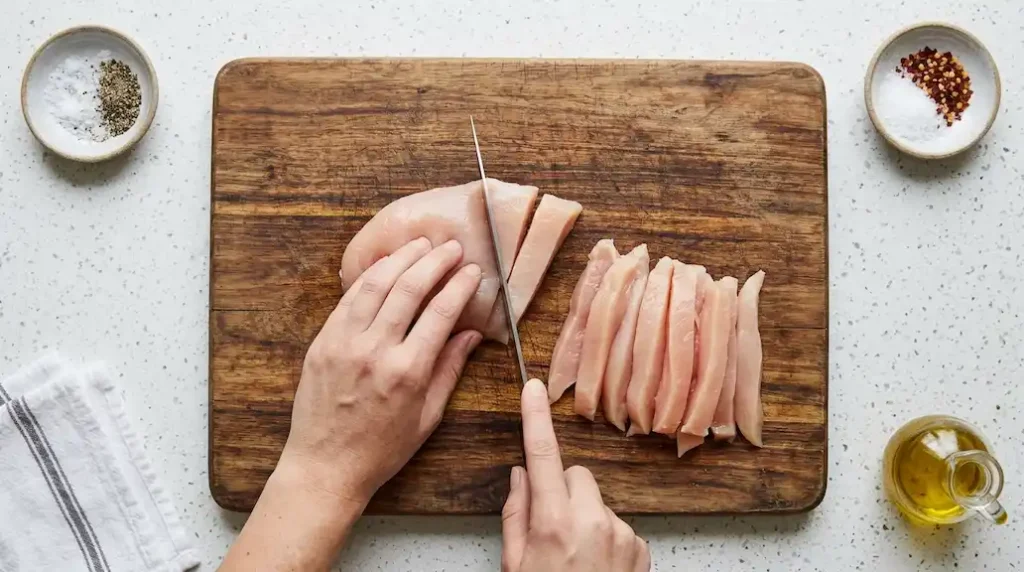
A few minutes of setup makes the frying process go smoothly. Cut the chicken into strips roughly ½ inch thick and 3 to 4 inches long, so every piece cooks at the same rate. Uneven pieces mean some fries are overcooked while others are still raw in the middle.
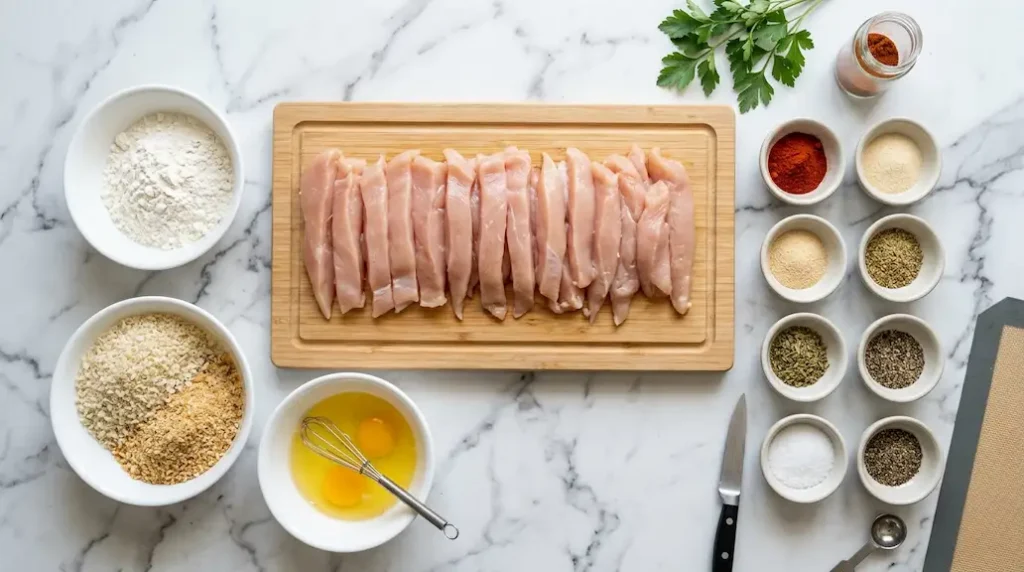
Set up your breading station before you touch the oil: one bowl for seasoned flour, one for beaten eggs, and one for breadcrumbs. Keep one hand for dry ingredients and one hand for wet ingredients — this “one-hand rule” keeps your fingers from turning into a breaded mess and prevents cross-contamination between the raw chicken and your dry coating.
Pat the chicken completely dry with paper towels first; excess moisture is the number one reason breading slides off during frying.
Recipe Success Checklist
- ✓ Chicken strips are cut to a similar size and thickness
- ✓ Chicken is patted completely dry before breading
- ✓ Breading station (flour, egg, breadcrumbs) is fully set up
- ✓ Oil is heated to 350°F before the first batch goes in
- ✓ Chicken is coated evenly with no bare spots
- ✓ Pan is not overcrowded during frying
- ✓ Internal temperature reaches 165°F before serving
Ingredients
For the chicken:
- 1 ½ pounds boneless, skinless chicken breasts (or boneless thighs)
- 1 teaspoon salt
- ½ teaspoon black pepper
For the coating:
- 1 cup all-purpose flour
- 1 cup panko or regular breadcrumbs
- 2 large eggs
- 2 tablespoons milk or buttermilk
- 1 tablespoon garlic powder
- 1 tablespoon paprika
- 1 teaspoon onion powder
- 1 teaspoon salt
- ½ teaspoon black pepper
- ½ teaspoon cayenne pepper (optional, for mild heat)
For frying:
- 3 to 4 cups vegetable oil, canola oil, or peanut oil (enough for at least 1 ½ inches of oil in your pan)
Ingredient Notes
Chicken: Boneless breasts give you long, straight strips that are easy to cut evenly. Boneless thighs are juicier and more forgiving if slightly overcooked, but they’re harder to cut into uniform pieces.
Flour: All-purpose flour is the base layer that helps the egg wash stick. It also thickens slightly during frying, adding to the crunch.
Breadcrumbs: Panko creates a lighter, extra-crunchy shell with visible texture. Regular breadcrumbs make a denser, more classic coating closer to a recipe for kfc original fried chicken texture. Either works well here.
Eggs and milk: The egg-and-milk mixture is what the flour and breadcrumbs cling to. A splash of milk thins the egg slightly so it coats more evenly without pooling.
Seasonings: Garlic powder, paprika, and onion powder season the coating itself, not just the surface, so every bite tastes seasoned instead of bland.
Oil: Choose a neutral oil with a high smoke point. Vegetable, canola, and peanut oil all hold up well at 350°F without burning or adding unwanted flavor.
Choosing the Best Chicken
Chicken breast is the most popular choice for this fried chicken fries recipe because it’s lean, mild in flavor, and easy to slice into long, even strips. It cooks relatively quickly, which works well for the thin, fry-shaped cut.
Boneless chicken thighs are a great alternative if you prefer a juicier bite. Thigh meat has more fat, so it’s more forgiving if a piece cooks a minute or two longer than planned. The tradeoff is that thighs are less uniform in shape, so you’ll need to trim them more carefully to get consistent strips.
Kitchen Equipment
- Heavy-bottomed skillet or Dutch oven (holds heat steadily for even frying)
- Instant-read thermometer (for both oil and chicken temperature)
- Tongs (for safely turning and removing chicken)
- Wire rack set over a baking sheet (for draining without sogginess)
- Three shallow bowls or pie plates (for the breading station)
Preparing the Chicken
Start with chicken breasts trimmed of any excess fat or connective tissue. Slice each breast lengthwise into strips about ½ inch thick and 3 to 4 inches long — roughly the size of a thick steak fry. Try to keep every piece close to the same thickness. This matters because thinner pieces cook faster than thick ones; if your strips vary too much in size, you’ll end up pulling some out raw while others turn dry and tough.
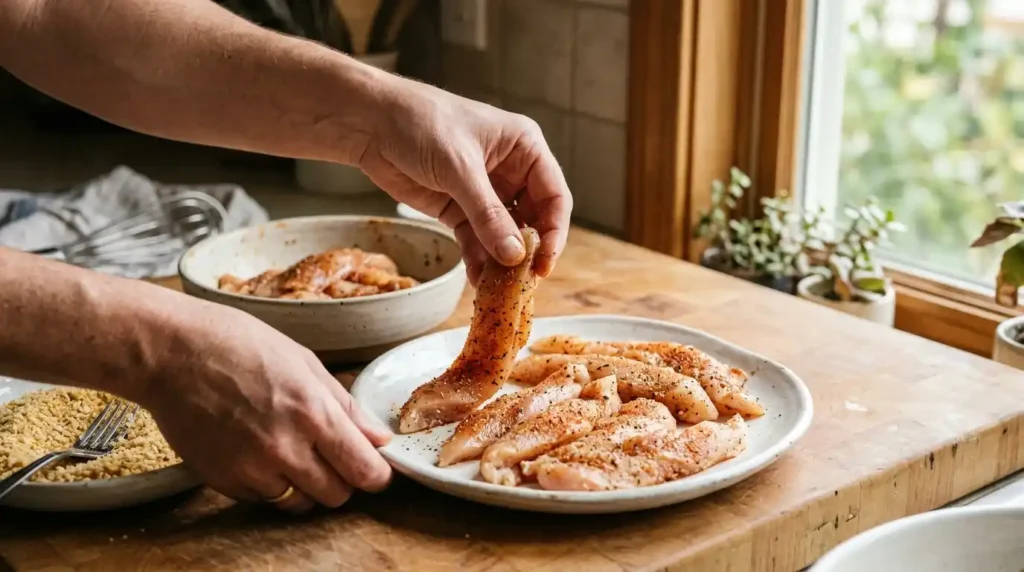
Once cut, pat every piece dry with paper towels. Removing surface moisture helps the flour adhere properly in the next step and keeps the hot oil from spattering.
Breading Technique
Set up three shallow bowls in this order: seasoned flour, whisked egg and milk, and seasoned breadcrumbs. Working one piece at a time, coat the chicken strip in flour and shake off the excess — a thick, clumpy flour layer causes uneven browning and bare spots later. Next, dip the floured strip into the egg wash, letting any extra egg drip off. Finally, press the strip into the breadcrumbs, pressing gently so the crumbs stick firmly on all sides.
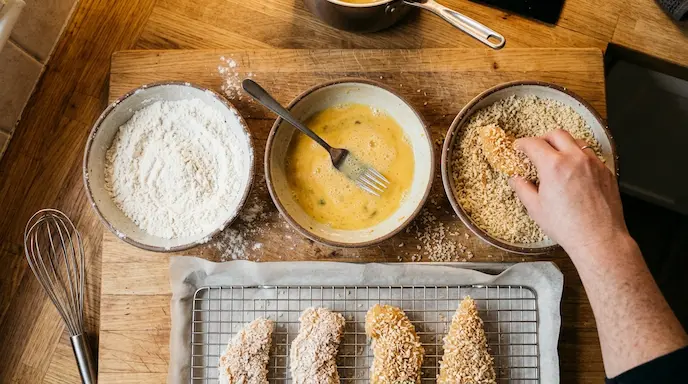
This three-step order matters: flour gives the egg something to grip, the egg acts as glue, and the breadcrumbs form the crunchy outer shell. Skipping the flour step is the most common reason breading slides off in the oil. Place each finished strip on a tray in a single layer, not stacked, until you’re ready to fry.
Frying Technique
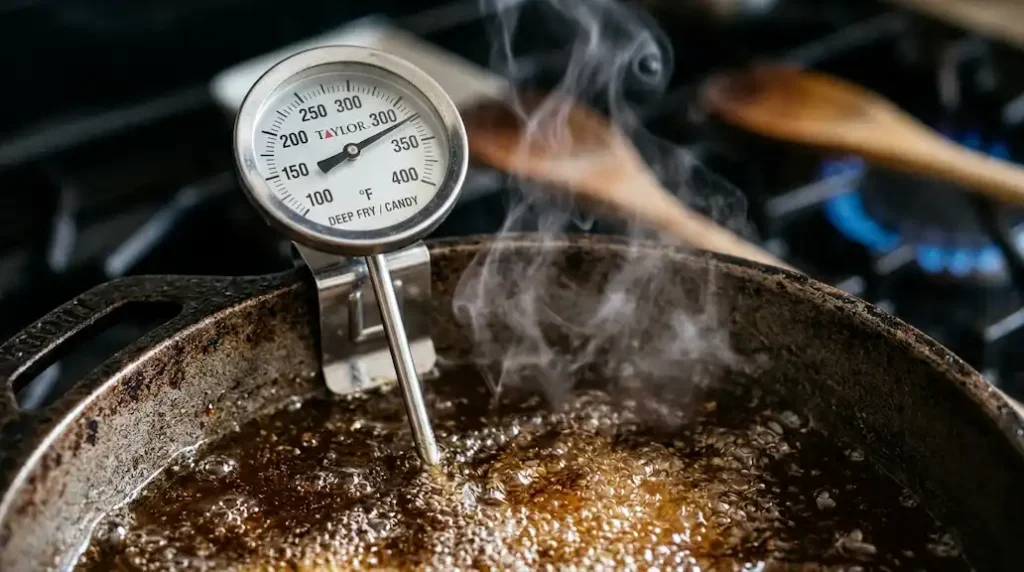
Pour oil into a heavy skillet or Dutch oven until it reaches about 1 ½ inches deep. Heat the oil to 350°F, checking with an instant-read or candy thermometer rather than guessing — oil that’s too cool leads to greasy, soggy chicken fries, while oil that’s too hot burns the coating before the chicken cooks through.
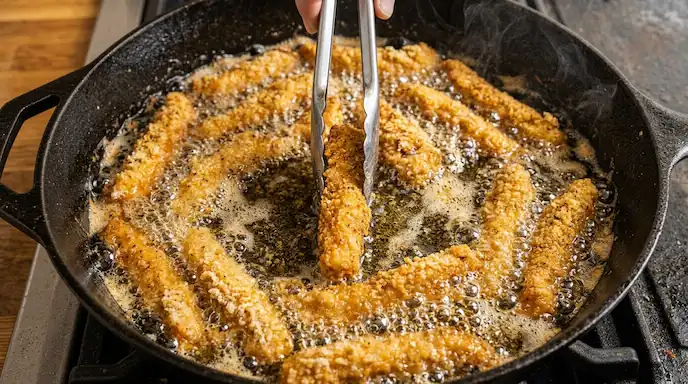
Fry the chicken strips in small batches of 5 to 6 pieces at a time. Adding too many at once drops the oil temperature quickly, which is the fastest way to end up with pale, oily coating instead of a crisp one. Fry each batch for 3 to 4 minutes, turning once halfway through, until the coating is deep golden brown on all sides. Let the oil come back up to 350°F between batches before adding the next round.
How to Get Extra Crispy Chicken Fries
- Dry chicken first: Moisture is the enemy of crispness — pat every strip dry before breading.
- Double-press the breadcrumbs: Pressing firmly helps the coating stay intact through frying instead of flaking off.
- Watch the oil temperature closely: A thermometer beats guesswork every time; 350°F is the sweet spot.
- Don’t crowd the pan: Overcrowding drops the oil temperature and steams the coating instead of frying it.
- Drain on a wire rack: Paper towels trap steam underneath the chicken, which softens the crust.
How to Know the Chicken Is Done
Color alone isn’t a reliable way to check doneness — a deep golden coating can form before the chicken inside is fully cooked, especially on thicker strips. Use an instant-read thermometer and insert it into the thickest part of a strip. According to USDA food safety guidance, chicken is safe to eat once it reaches an internal temperature of 165°F. If a piece reads below that, return it to the oil for another 30 to 60 seconds rather than serving it undercooked.
Draining & Serving
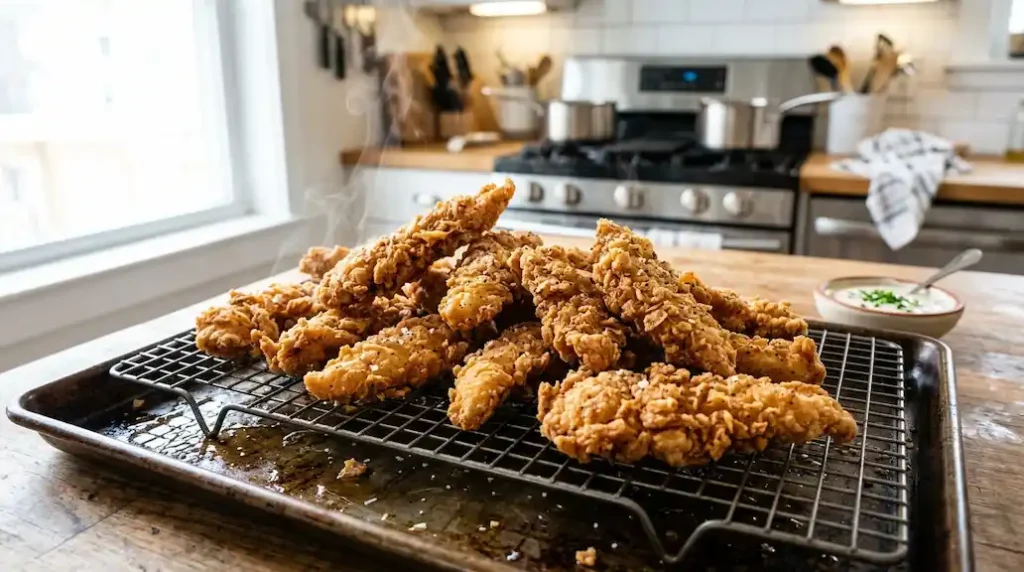
Transfer fried chicken strips straight from the oil to a wire rack set over a baking sheet. A wire rack lets air circulate underneath so the bottom stays crisp, while paper towels trap steam and can leave the underside soggy within minutes. Serve the chicken fries within 5 to 10 minutes of frying for the crunchiest texture — they’re best fresh and hot, right when the coating is at its crispiest.
Why This Recipe Works
Every step in this fried chicken fries recipe serves a purpose. Cutting the chicken into similar-sized strips means everything finishes cooking at the same time. The three-layer breading — flour, egg, breadcrumbs — creates a coating that clings tightly instead of flaking off in the oil. Frying at a steady 350°F cooks the chicken through while browning the crust at the same rate, and draining on a wire rack keeps that crust crisp instead of steaming it soft.
Recipe Science
When breaded chicken hits 350°F oil, the surface moisture flashes into steam almost instantly, which is what creates those tiny bubbles and the crunchy texture as the coating sets. If the oil is too cool, that reaction slows down, and the coating absorbs oil instead of crisping — that’s why cold oil leads to greasy results. Overcrowding the pan has the same effect: adding several cold pieces at once drops the oil temperature fast, which is why smaller batches fry better than one giant batch.
Coating adhesion comes down to the flour-egg-breadcrumb sequence — the egg is genuinely acting as glue between two different textures, and finally, that 165°F internal temperature matters because it’s the point at which harmful bacteria in raw poultry are destroyed.
Expert Tips
- Cut chicken strips to a consistent ½-inch thickness for even cooking.
- Season the flour and breadcrumbs, not just the raw chicken, so flavor runs all the way through.
- Let breaded strips rest on a tray for 5 minutes before frying — this helps the coating set and stick better.
- Use a thermometer for both the oil and the finished chicken; don’t rely on color alone.
- Fry in small batches of 5 to 6 pieces to keep the oil temperature steady.
- Turn chicken only once during frying to avoid knocking off the coating.
- Skim any loose breadcrumbs out of the oil between batches so they don’t burn and flavor the next round.
- Always drain on a wire rack, never stacked on paper towels.
- Season the chicken with a light pinch of salt right after frying, while it’s still hot.
- Serve immediately for the best crunch — chicken fries lose crispness quickly as they sit.
- Keep raw chicken and breaded chicken on separate plates to avoid cross-contamination.
- If frying for a crowd, keep finished batches warm in a 200°F oven on a wire rack instead of stacking them.
Common Mistakes
- Cutting pieces too thick: Thick strips take longer to cook through, so the coating can burn before the chicken is done. Keep strips around ½ inch thick.
- Uneven chicken pieces: Inconsistent sizes mean uneven cooking times. Cut carefully and trim thick ends.
- Wet chicken before breading: Excess moisture prevents the flour from sticking. Pat chicken dry first.
- Breading falling off: Usually caused by skipping the flour step or not pressing the breadcrumbs on firmly enough.
- Oil too cold: Leads to greasy, soggy chicken fries. Always preheat to 350°F and check with a thermometer.
- Oil too hot: Burns the coating before the inside cooks. Lower the heat if the coating darkens too quickly.
- Overcrowding the pan: Drops the oil temperature and steams the coating instead of crisping it. Fry in small batches.
- Not checking internal temperature: Relying on color alone can leave chicken undercooked. Always confirm 165°F with a thermometer.
- Draining on paper towels: Traps steam underneath and softens the crust. Use a wire rack instead.
Troubleshooting
Why are my chicken fries not crispy?
The oil was likely too cool when the chicken went in, or the strips sat too long before serving. Confirm the oil hits 350°F and serve right after draining.
Why does the breading fall off?
This usually happens when the flour step is skipped, the chicken wasn’t dried first, or the breadcrumbs weren’t pressed on firmly enough.
Why are my chicken fries greasy?
Greasy chicken almost always means the oil temperature dropped too low, often from overcrowding the pan.
Why is the outside dark but the chicken not done?
The oil was too hot. Lower the temperature slightly and cut strips a bit thinner next time.
Why did the coating turn soggy after frying?
Draining on paper towels traps steam under the chicken. Switch to a wire rack.
Why is my chicken dry?
Overcooking is the most common cause. Pull pieces as soon as they hit 165°F rather than frying “just to be safe.”
Substitutions
Swap chicken breast for boneless thighs if you prefer a juicier bite; thighs are more forgiving but slightly harder to cut evenly. Panko can replace regular breadcrumbs for a lighter, crunchier shell, while regular breadcrumbs give a denser, more traditional texture closer to a classic recipe for fried chicken crust. Buttermilk can replace the milk-and-egg mixture for a tangier flavor and slightly more tender texture, though it will add a few minutes to prep time for marinating.
Variations
- Spicy chicken fries: Add ½ to 1 teaspoon cayenne pepper and a dash of hot sauce to the egg wash.
- Garlic Parmesan chicken fries: Toss the finished fries in melted butter, grated Parmesan, and fresh garlic right after frying.
- Cajun chicken fries: Replace the paprika and pepper with a store-bought or homemade Cajun seasoning blend.
- Buttermilk-style chicken fries: Marinate the raw strips in buttermilk for 30 minutes before breading for extra tenderness.
- Extra-crispy chicken fries: Double-dip each strip — dip in egg and breadcrumbs twice — for a thicker, crunchier shell.
Dipping Sauces
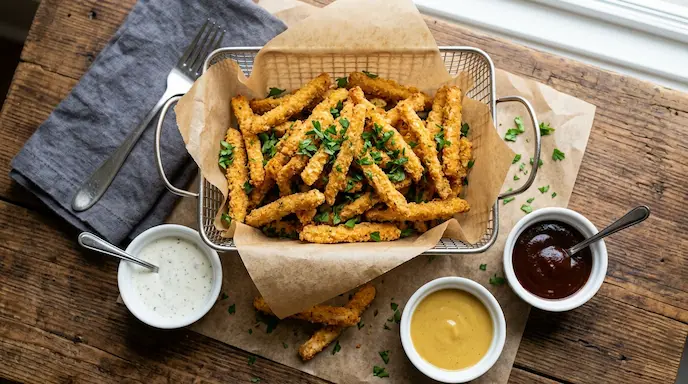
Chicken fries pair naturally with classic dipping sauces. Ranch and honey mustard offer a cool, tangy contrast to the crispy, savory coating. BBQ sauce adds smoky sweetness, while spicy mayo or buffalo sauce bring extra heat for anyone who likes a kick. Setting out two or three options lets everyone customize their own plate, which works especially well for parties or family dinners.
Serving Suggestions
For a quick lunch, serve chicken fries with a simple side salad or sweet potato fries. For dinner, pair them with coleslaw and cornbread for a comforting, casual meal. On game day, pile them onto a platter with multiple dipping sauces alongside other finger foods. They also work well tucked into a wrap with lettuce, tomato, and ranch for a fast handheld lunch option.
Storage
Let leftover chicken fries cool to room temperature before storing — sealing them while warm traps steam and softens the coating. Store cooled chicken fries in an airtight container in the refrigerator for up to 3 days. For longer storage, freeze them in a single layer on a baking sheet until solid, then transfer to a freezer bag for up to 2 months. Freezing individually first keeps the pieces from sticking together in a solid block.
Reheating
An oven or air fryer keeps the coating crisp far better than a microwave, which tends to make breaded chicken rubbery and soggy. Reheat in a 375°F oven for 8 to 10 minutes, or in an air fryer at 375°F for 5 to 6 minutes, flipping halfway through. A skillet with a small amount of oil over medium heat also works well for smaller batches, about 2 to 3 minutes per side.
Make-Ahead
You can prep the chicken strips and bread them up to 24 hours ahead. Arrange the breaded, uncooked strips in a single layer on a tray, cover, and refrigerate until you’re ready to fry. This actually helps the coating set and adhere better. Frying from cold refrigerated chicken is fine — just add an extra minute or so to the cooking time and always confirm doneness with a thermometer rather than going by time alone.
Frequently Asked Questions
What chicken is best for chicken fries?
Boneless, skinless chicken breast is the easiest to cut into even strips, though boneless thighs work well if you prefer extra juiciness.
How do I make chicken fries crispy?
Dry the chicken before breading, press the breadcrumbs on firmly, fry at a steady 350°F, and drain on a wire rack instead of paper towels.
What temperature should I fry chicken fries at?
Aim for 350°F oil, checked with a thermometer rather than guessing by sight.
Why does my breading fall off?
Usually from skipping the flour step, wet chicken, or not pressing the breadcrumbs on tightly enough.
How do I keep fried chicken fries crispy after cooking?
Drain on a wire rack and serve within 5 to 10 minutes, since breaded chicken loses crunch quickly as it sits.
Can I make chicken fries in an air fryer?
Yes. Spray breaded strips lightly with oil and air fry at 400°F for 10 to 12 minutes, flipping halfway, until they reach 165°F inside.
Can I freeze fried chicken fries?
Yes, freeze cooled chicken fries in a single layer, then transfer to a freezer bag for up to 2 months.
How do I reheat chicken fries?
Use an oven or air fryer at 375°F for the best texture; avoid the microwave, which softens the coating.
Can I use frozen chicken for this recipe?
Yes, but thaw it completely and pat it very dry first, since frozen or partially thawed chicken holds excess moisture that prevents the breading from sticking.
Final Thoughts
This fried chicken fries recipe proves you don’t need a drive-thru to get crispy, craveable chicken fries at home. With a well-seasoned three-step coating, a steady 350°F oil temperature, and a quick rest on a wire rack, you’ll get a crunchy shell and juicy center every time.
Keep the pieces evenly cut, don’t crowd the pan, and check for that 165°F internal temperature, and you’ll have a batch worth making again and again.