
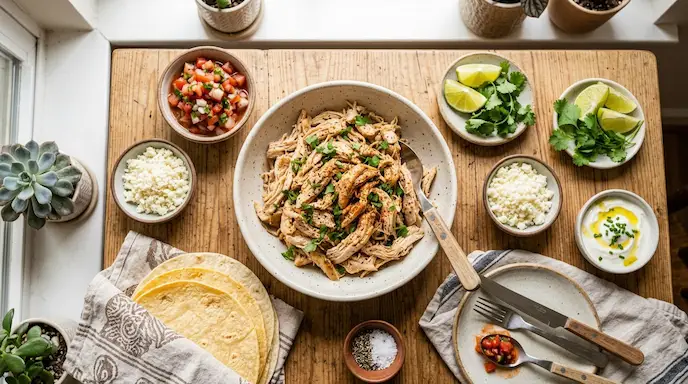
This shredded chicken recipe is the kind of recipe I want in my back pocket on a busy weeknight. It is simple, dependable, and incredibly useful. You start with basic chicken breasts and a handful of pantry seasonings, then gently cook them in chicken broth until tender enough to pull apart with a fork.
The result is juicy, flavorful chicken with a soft, shreddable texture—not bland chicken that needs a mountain of sauce to become interesting.
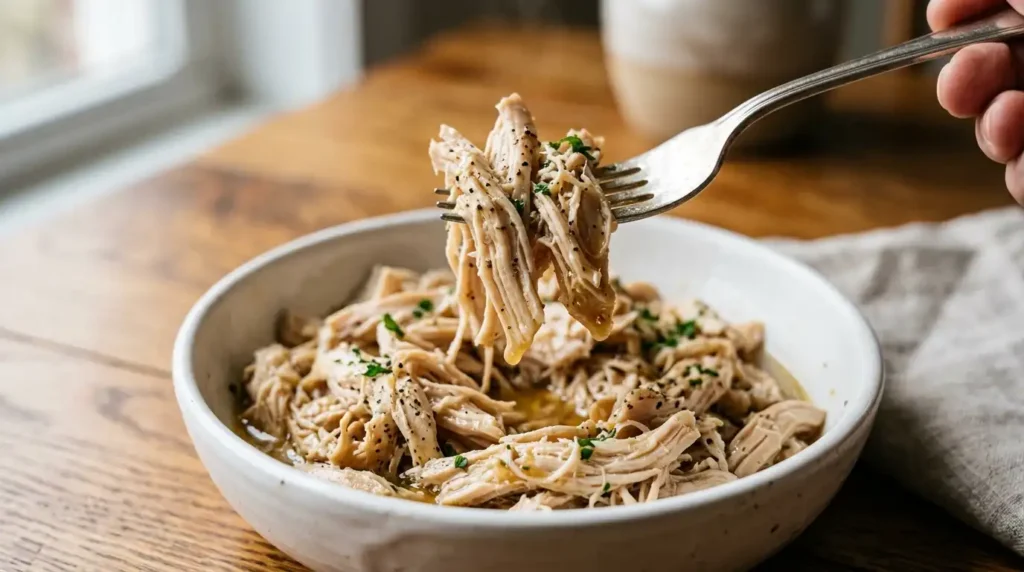
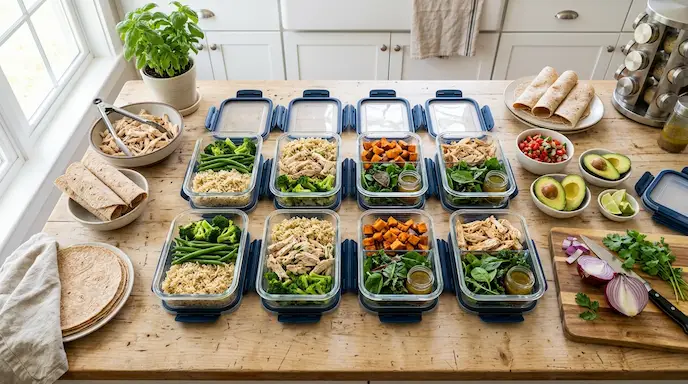
I also love how flexible this recipe is. Use the chicken for tacos tonight, pile it into sandwiches tomorrow, or portion it into containers for easy lunches throughout the week. The cooking liquid adds extra moisture, so the finished chicken stays much more enjoyable than chicken that has simply been boiled and drained.
If you enjoy cooking chicken in different ways, you may also want to explore a bone in chicken breast recipe for another flavorful option.
This easy shredded chicken recipe makes tender, juicy, well-seasoned chicken with a simple stovetop method. It is ready in about 30 minutes and is perfect for tacos, sandwiches, salads, rice bowls, soups, pasta, and meal prep.
Prep Time: 10 minutes
Cook Time: 20 minutes
Total Time: 30 minutes
Servings: 6
Estimated Calories: 225 calories per serving
Ingredients: Boneless, skinless chicken breasts, low-sodium chicken broth, kosher salt, garlic powder, onion powder, smoked paprika, black pepper, and olive oil.
Quick Instructions: Season the chicken, sear it briefly, add chicken broth, cover, and gently simmer until the thickest part reaches 165°F. Rest the chicken in the cooking liquid, then shred it and toss it with some of the flavorful liquid.
Notes: For the juiciest texture, do not boil the chicken aggressively. A gentle simmer and an instant-read thermometer are the keys to reliable results.
Table of Contents
Why You’ll Love This shredded chicken recipe
There are plenty of ways to cook chicken, but this method earns a regular spot in my kitchen because it solves several weeknight problems at once.
- It uses everyday ingredients. Nothing unusual is required.
- It cooks quickly. Boneless chicken breasts can be ready in about 20 minutes of cooking time.
- The chicken stays moist. Chicken broth provides a flavorful cooking environment.
- It is easy to season. The savory combination of garlic, onion, paprika, and black pepper works with many dishes.
- It is meal-prep friendly. Cook a batch once and use it in several meals.
- It freezes well. Properly portioned chicken can be frozen for later.
- It is versatile. Change the sauce or final seasoning depending on how you plan to serve it.
The flavor is savory and lightly smoky from the paprika, with enough seasoning to make the chicken delicious on its own while still leaving room for sauces and toppings.
Before You Start
A few minutes of preparation makes this recipe much easier.
First, check the thickness of your chicken breasts. Very thick pieces can cook unevenly, leaving the outside done before the center reaches a safe temperature. If needed, gently pound the thicker sections so the pieces are closer to an even thickness.
Measure the seasonings before you begin. The actual cooking goes quickly once the pan is hot, so having everything ready keeps you from scrambling.
Finally, have an instant-read thermometer nearby. Color alone is not a reliable way to determine whether chicken is safely cooked.
Recipe Success Checklist
- Chicken prepared evenly: Helps the breasts cook at a similar rate.
- Seasonings measured: Gives every piece balanced flavor.
- Broth ready: You can add it immediately after searing.
- Lid nearby: Covered cooking helps the chicken cook gently and evenly.
- Thermometer ready: The safest way to verify doneness.
Ingredients
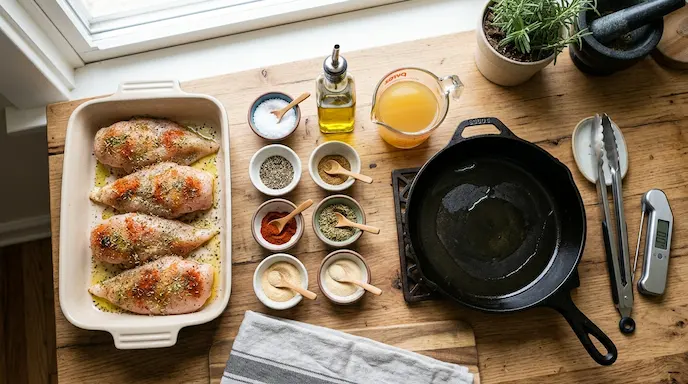
- 2 lb boneless, skinless chicken breasts
- 1 tbsp olive oil
- 1 tsp kosher salt
- 1 tsp garlic powder
- 1 tsp onion powder
- 1 tsp smoked paprika
- 1/2 tsp black pepper
- 1 1/2 cups low-sodium chicken broth
Ingredient Notes
Chicken breasts: Boneless, skinless breasts are convenient, lean, and easy to shred. Choose pieces that are similar in size when possible.
Chicken broth: Broth does more than prevent the pan from drying out. It helps keep the chicken moist and adds savory flavor. Low-sodium broth gives you more control over the final seasoning.
Smoked paprika: A small amount adds gentle smokiness without making the chicken taste heavily smoked. Regular paprika can be substituted for a milder flavor.
Garlic and onion powder: These season the chicken evenly. Powders are especially useful here because they distribute throughout the cooking liquid and finished shredded meat.
Olive oil: A little oil helps with the initial sear and adds richness.
Kosher salt and black pepper: These provide the basic seasoning foundation. If using fine table salt, use slightly less because it is denser by volume.
Choosing the Best Chicken
Boneless, skinless chicken breasts are the best choice for this particular recipe because they cook quickly and shred easily.
Boneless chicken thighs are an excellent alternative if you prefer darker meat. They contain more fat and tend to stay juicy, but their cooking time can vary depending on size. They also have a richer flavor.
Bone-in chicken breasts can produce flavorful, juicy meat, but they require more cooking time and are less convenient for a quick weeknight recipe. Remove the bones and skin before shredding.
Skinless chicken is the simplest option for shredding. Skin-on chicken can add flavor during cooking, but the skin needs to be removed before shredding.
Whichever cut you use, avoid crowding the pan. Chicken pieces need enough room to cook evenly.
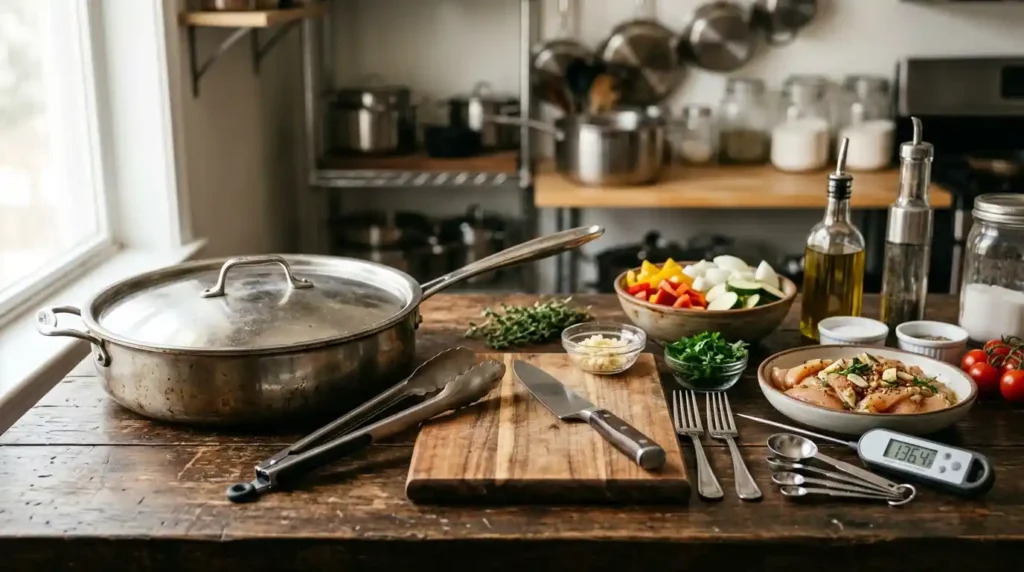
Kitchen Equipment
You only need a few basic tools:
- Large skillet or sauté pan with a lid
- Tongs
- Instant-read thermometer
- Two forks for shredding
- Cutting board
- Measuring spoons
A stand mixer can be useful if you are shredding a very large batch, but it is not necessary for this recipe.
Step-by-Step Instructions
Step 1: Season the Chicken
What to Do:
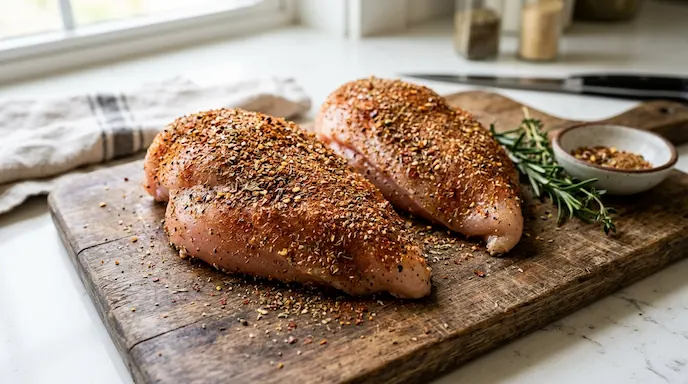
Pat the chicken breasts dry with paper towels. Combine the kosher salt, garlic powder, onion powder, smoked paprika, and black pepper in a small bowl. Sprinkle the seasoning evenly over both sides of the chicken and gently press it into the surface.
Why It Matters:
Dry chicken sears more effectively, while evenly distributed seasoning prevents bland bites.
Visual Cues:
The chicken should be evenly coated with a thin layer of seasoning.
Texture Cues:
The surface should feel dry rather than wet or slippery.
Timing:
About 5 minutes.
Helpful Tip:
If your chicken breasts are very thick on one end, gently pound them to an even thickness before seasoning.
What to Look For:
Every piece should have visible seasoning on both sides.
Step 2: Sear the Chicken
What to Do:
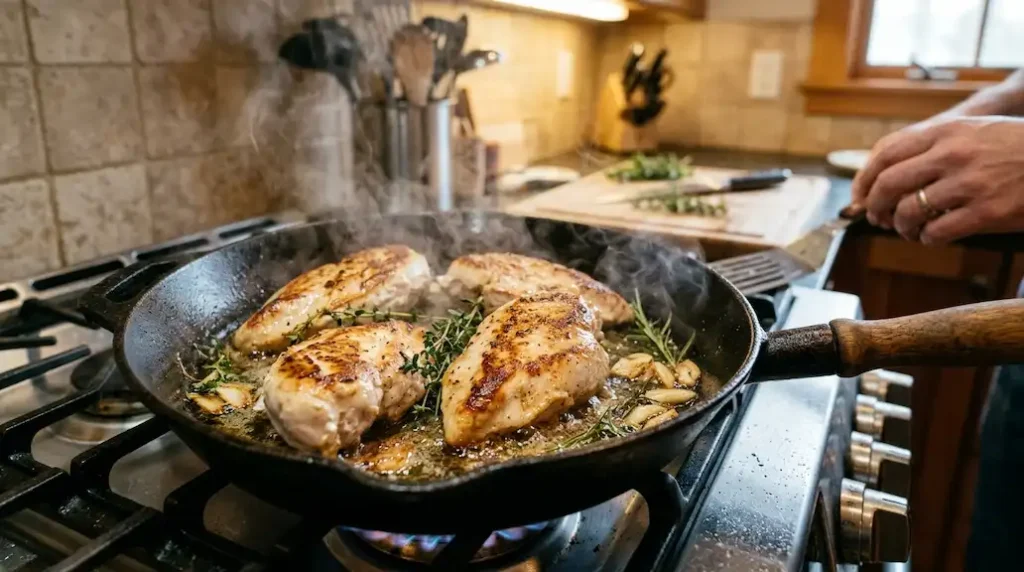
Heat the olive oil in a large covered skillet over medium heat. Once the oil is hot, add the seasoned chicken breasts in a single layer. Cook for about 2 to 3 minutes per side.
Why It Matters:
The brief sear develops savory browned flavors before the chicken finishes cooking in broth.
Visual Cues:
You should see light golden-brown patches developing on the chicken.
Texture Cues:
The outside should begin to firm up, while the center remains uncooked.
Timing:
About 5 to 6 minutes total.
Helpful Tip:
Do not try to move the chicken constantly. Let it sit against the hot pan long enough to develop some color.
What to Look For:
You are not trying to cook the chicken through at this point. A little browning is enough.
Step 3: Add the Chicken Broth
What to Do:
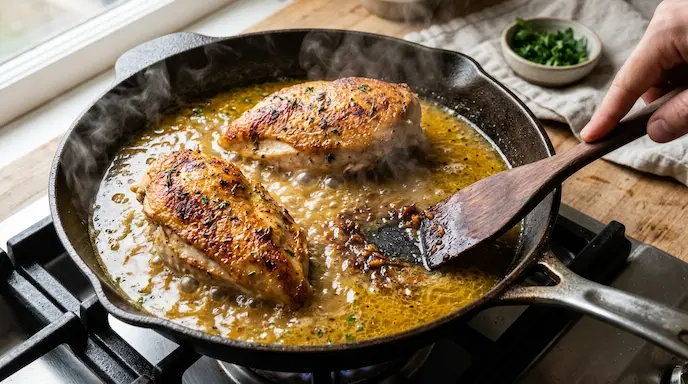
Carefully pour 1 1/2 cups of low-sodium chicken broth into the skillet. Scrape the bottom gently with a wooden spoon or spatula to loosen any browned seasoning.
Why It Matters:
The broth creates the moist cooking environment that helps the chicken become tender while adding flavor.
Visual Cues:
The broth should surround the chicken without completely submerging it.
Texture Cues:
The liquid should remain loose and clear rather than thick.
Timing:
About 1 minute.
Helpful Tip:
Pour the broth slowly to reduce splashing.
What to Look For:
Any browned bits on the bottom of the skillet should loosen into the broth.
Step 4: Cover and Gently Simmer
What to Do:
Bring the broth to a gentle simmer, then reduce the heat to medium-low. Cover the skillet and cook for about 10 to 15 minutes, depending on the thickness of the chicken.
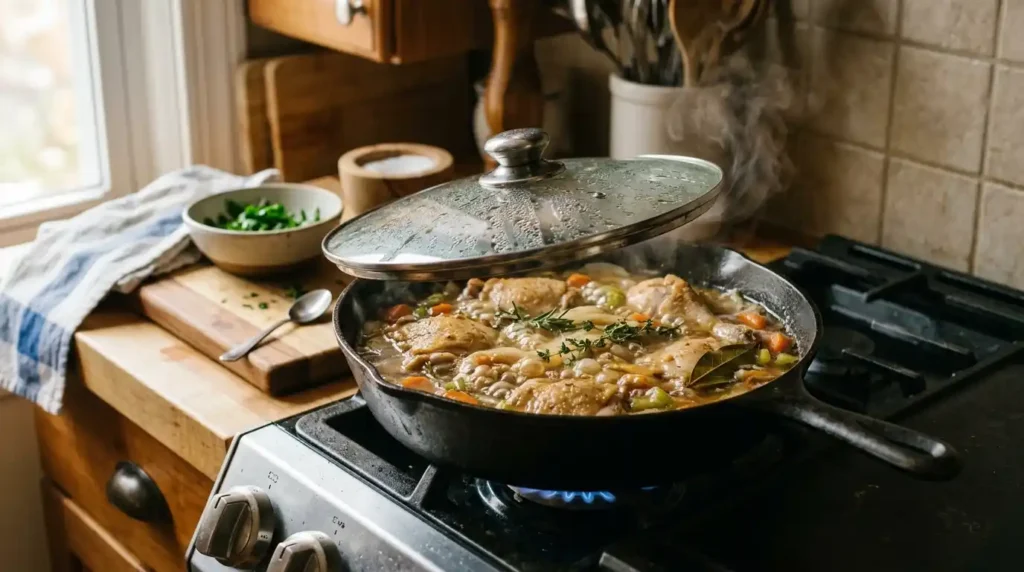
Begin checking the internal temperature after 10 minutes.
Why It Matters:
Gentle covered cooking helps the chicken cook evenly without aggressively boiling the meat.
Visual Cues:
Small bubbles should move gently around the edges of the pan. You should not see a rapid rolling boil.
Texture Cues:
The chicken should become firm but still moist.
Timing:
About 10 to 15 minutes.
Helpful Tip:
Keep the lid on as much as possible. Repeatedly lifting it allows heat and moisture to escape.
What to Look For:
The thickest part of each chicken breast must reach 165°F.
Step 5: Check for Doneness
What to Do:
Insert an instant-read thermometer into the thickest part of the largest chicken breast, avoiding contact with the pan. The chicken is safely cooked when it reaches 165°F.
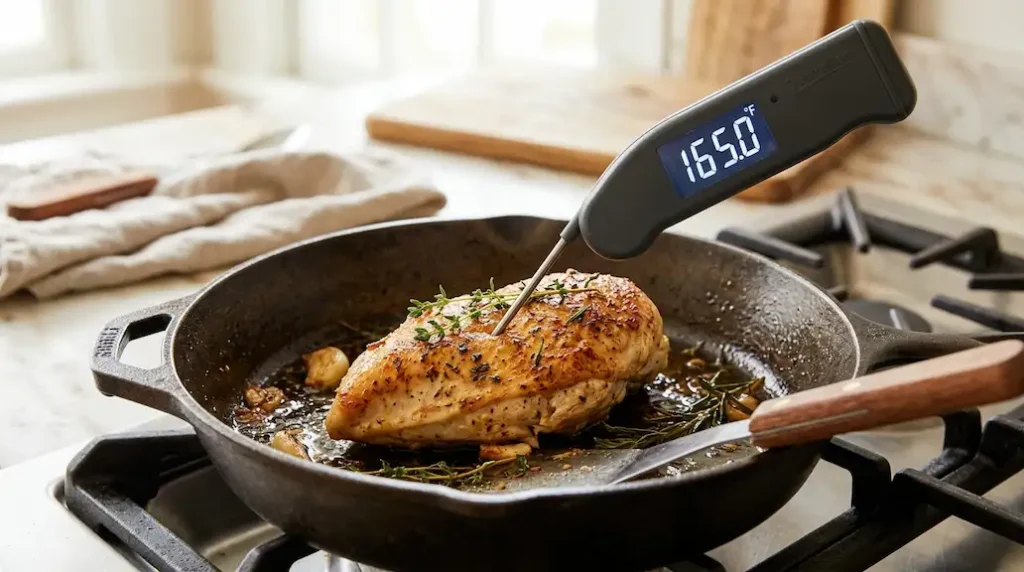
Why It Matters:
Chicken needs to reach a safe internal temperature. A thermometer is more reliable than judging doneness by color.
Visual Cues:
The chicken should be opaque rather than translucent in the center.
Texture Cues:
The meat should feel firm but not hard.
Timing:
Usually 1 to 2 minutes for checking several pieces.
Helpful Tip:
Check every large or unusually thick piece rather than assuming all pieces reached the same temperature.
What to Look For:
A reading of 165°F in the thickest part confirms the chicken has reached the recommended safe internal temperature.
For detailed food-safety guidance, see the USDA.
Step 6: Rest the Chicken in the Cooking Liquid
What to Do:
Turn off the heat and let the chicken rest in the warm broth for about 5 minutes.
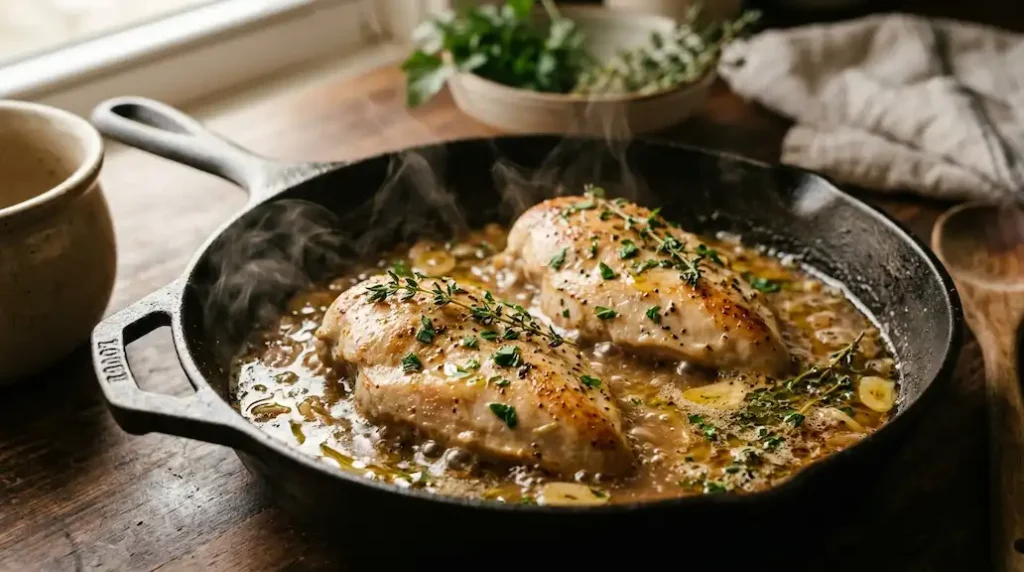
Why It Matters:
The short rest gives the meat time to settle and allows the cooking liquid to remain in contact with the chicken.
Visual Cues:
The broth should still be warm, with a little steam rising from the skillet.
Texture Cues:
The chicken should feel tender when pressed lightly with tongs.
Timing:
5 minutes.
Helpful Tip:
Do not drain the cooking liquid yet. You will use some of it to keep the shredded chicken moist.
What to Look For:
The chicken should be warm enough to handle and tender enough to begin pulling apart easily.
Step 7: Shred the Chicken
What to Do:
Transfer the chicken to a cutting board or shallow bowl. Shred it with two forks, pulling the meat apart along its natural grain. Return the shredded chicken to the skillet and toss it with several spoonfuls of the warm cooking liquid.
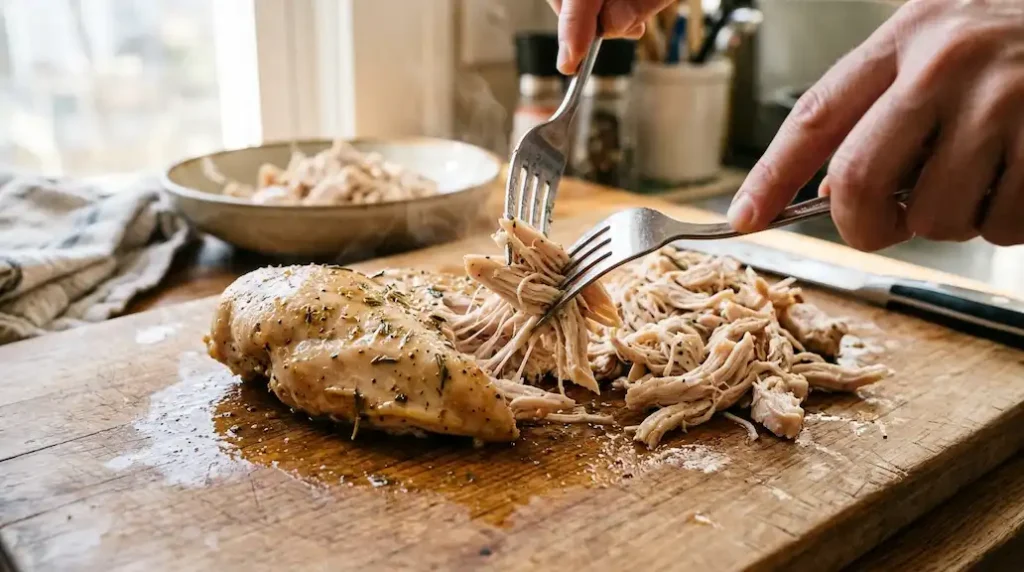
Why It Matters:
Shredding while the chicken is still warm is easier, and adding cooking liquid keeps the strands moist.
Visual Cues:
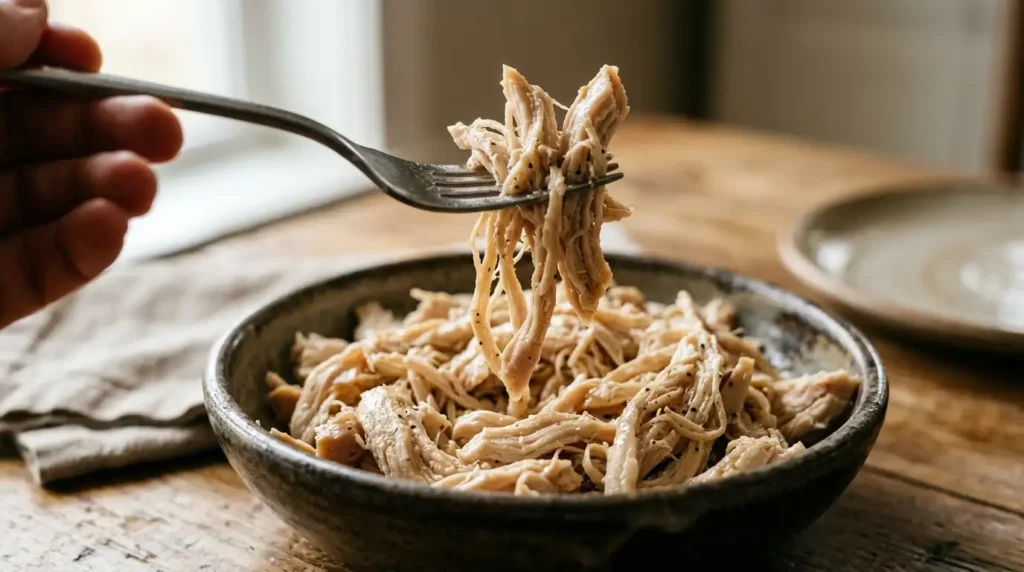
The chicken should separate into distinct, soft strands.
Texture Cues:
It should feel tender rather than rubbery.
Timing:
About 5 minutes.
Helpful Tip:
Do not shred the chicken into tiny crumbs. Medium-sized strands have better texture and are easier to use in tacos, sandwiches, salads, and bowls.
What to Look For:
The finished chicken should be moist, tender, and evenly coated with a small amount of flavorful broth.
How to Shred Chicken
Two forks are the easiest method for a batch this size. Hold the chicken steady with one fork and pull the other fork through the meat.
Your hands can work well when the chicken has cooled enough to handle safely. This gives you excellent control over the size of the pieces, but avoid handling very hot chicken.
A stand mixer is useful when making a large batch. Place warm cooked chicken in the mixer bowl and use the paddle attachment on low speed for short bursts. Watch it closely so the chicken does not become overly fine.
For the best texture, shred the chicken while it is warm and then add some reserved cooking liquid. If the chicken will be stored, keep it with enough moisture to prevent the exposed strands from drying out.
Why This Recipe Works
The success of this recipe comes down to a few simple details.
First, the chicken gets seasoned before cooking, so flavor is not limited to the outside. The quick sear adds another layer of savory flavor.
Next, the chicken finishes cooking in broth rather than in a dry skillet. That moist environment makes a noticeable difference in the finished texture.
The covered skillet also helps maintain a steady cooking temperature. Instead of rapidly boiling the meat, you are gently cooking it until the center reaches 165°F.
Finally, the short rest and the addition of cooking liquid after shredding help the chicken stay moist. These little steps are what turn ordinary cooked chicken into tender shredded chicken that works across many meals.
Recipe Science
Chicken can become dry when it is cooked longer or hotter than necessary. As the proteins tighten, they can push moisture out of the meat.
That is why the goal here is not simply to cook the chicken for a fixed amount of time. The 10-to-15-minute range is a guide. Thickness matters, so the thermometer determines when the chicken is finished.
Cooking liquid also matters. The broth surrounds the chicken during cooking and provides moisture while adding savory flavor.
Resting the chicken briefly before shredding gives the meat a chance to settle. Shredding while warm also requires less effort and makes it easier to separate the meat into tender strands.
Expert Tips for Better Shredded Chicken
- Choose similarly sized chicken breasts. Pieces with similar thickness are more likely to finish at the same time.
- Do not skip the thermometer. Chicken can look cooked before the center reaches 165°F.
- Use low-sodium broth. It lets you control the salt level more precisely.
- Keep the simmer gentle. A hard boil can make the exterior cook too aggressively.
- Avoid overcooking. Start checking the temperature at the 10-minute mark.
- Save the cooking liquid. A few spoonfuls can transform dry-looking shredded chicken.
- Shred while warm. Warm chicken pulls apart more easily than cold chicken.
- Use medium-sized strands. Very fine shreds can become dry and mushy.
- Season again after shredding if needed. Taste before adding more salt, especially if your broth contains sodium.
- Cool leftovers promptly. Divide a large batch into shallow containers so it cools more efficiently.
- Freeze in meal-sized portions. Smaller portions thaw and reheat faster.
- Reheat with moisture. A splash of broth or water helps prevent the chicken from drying out.
Common Mistakes
Overcooking the chicken: The most common problem is leaving the chicken on the heat long after it reaches 165°F. Start checking early.
Using too little liquid: The chicken needs enough broth to create a moist cooking environment. Use the full 1 1/2 cups called for in the recipe.
Boiling too aggressively: Keep the heat at medium-low after the broth begins simmering.
Underseasoning: Chicken breasts are mild, so seasoning matters. Taste the finished shredded chicken before serving.
Draining all the broth: Do not discard every drop. Toss the shredded meat with some of the cooking liquid.
Shredding too finely: Fine strands can dry out quickly. Pull the meat into medium-sized pieces.
Cooking uneven pieces: Very thick breasts may take considerably longer than smaller ones. Pound thick sections gently for more even cooking.
Poor storage: Leaving cooked chicken uncovered in the refrigerator can dry it out. Store it in a tightly sealed container with a little cooking liquid.
Troubleshooting
Why is my chicken dry?
It was probably cooked too long or at too high a temperature. Next time, begin checking the internal temperature earlier and keep the skillet at a gentle simmer. Add a little warm broth when shredding.
Why won’t my chicken shred easily?
The chicken may not be fully tender, or it may have cooled completely. If it has not reached 165°F, continue cooking until safely done. If it is already cooked, warm it gently in some broth before shredding.
Why is my shredded chicken bland?
Chicken breasts need enough seasoning. Taste the finished chicken after shredding and add a small amount of salt if necessary. You can also finish it with fresh herbs, hot sauce, barbecue sauce, or another sauce that suits your meal.
Why is the chicken tough?
Toughness can result from overcooking, very large chicken breasts, or cooking at too high a temperature. Use moderate heat and rely on an instant-read thermometer.
Why is the chicken unevenly cooked?
Uneven thickness is usually the culprit. Pound thick areas gently so the breasts have a more consistent thickness before cooking.
Ingredient Substitutions
Chicken thighs: Replace the chicken breasts with boneless, skinless thighs for richer flavor and a softer texture. Cooking time may vary, so use the thermometer rather than the clock.
Regular paprika: Use regular paprika instead of smoked paprika for a milder flavor.
Vegetable broth: It can work if chicken broth is unavailable, but the finished chicken will have less chicken flavor.
Fresh garlic: Finely minced fresh garlic can replace garlic powder, but it may brown during the initial sear. Garlic powder is easier to distribute evenly.
Fresh onion: Fresh onion is not a direct one-for-one replacement for onion powder in this recipe because it adds moisture and bulk. If you want onion flavor, sauté finely chopped onion before adding the chicken.
Recipe Variations
Garlic Herb Shredded Chicken
Add dried Italian seasoning with the existing spices, then finish the chicken with chopped fresh parsley. This version is excellent over rice, potatoes, or pasta.
Spicy Shredded Chicken
Add 1/2 tsp cayenne pepper to the seasoning blend. For even more heat, toss the finished chicken with your favorite hot sauce.
BBQ Shredded Chicken
Keep the base recipe as written, then mix the finished chicken with your favorite barbecue sauce. Serve it on toasted buns with crunchy slaw.
Mexican-Inspired Shredded Chicken
Replace the smoked paprika with chili powder and add ground cumin. Serve the finished chicken in tortillas with lime, avocado, salsa, and shredded cheese.
Lemon Herb Chicken
Add lemon zest and fresh parsley after shredding. A small squeeze of fresh lemon juice brightens the chicken just before serving.
Ways to Use Shredded Chicken
This chicken is deliberately neutral enough to move from one meal to another.
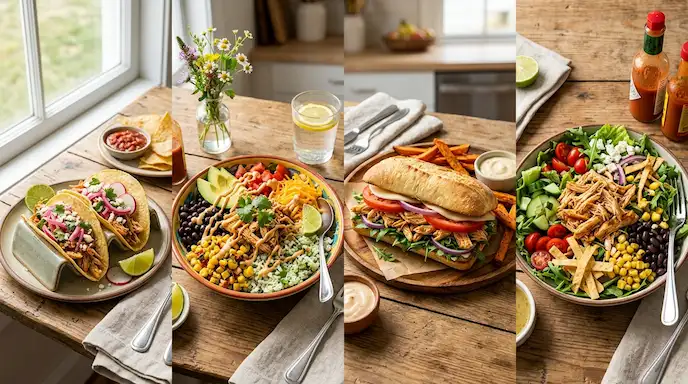
- Fill soft tortillas for quick tacos.
- Make barbecue chicken sandwiches.
- Add it to wraps with lettuce and ranch dressing.
- Top a green salad with warm shredded chicken.
- Stir it into cooked pasta with pesto or Alfredo sauce.
- Build rice bowls with vegetables and your favorite sauce.
- Add it to chicken soup.
- Use it in casseroles.
- Make quick meal-prep lunches with rice and roasted vegetables.
- Spoon it over baked potatoes with cheese and green onions.
For another weeknight idea, pair it with a fried chicken fries recipe when you want a fun comfort-food meal.
If you prefer dark meat, a grilled chicken thigh recipe is another excellent option for meal prep and casual dinners.
And when pasta is on the menu, try serving the chicken with a chicken pesto pasta recipe for a fast, flavorful combination.
Serving Suggestions
For tacos, serve the chicken with warm tortillas, avocado, salsa, shredded lettuce, and lime.
For sandwiches, toss the chicken with barbecue sauce and serve it on toasted buns with slaw.
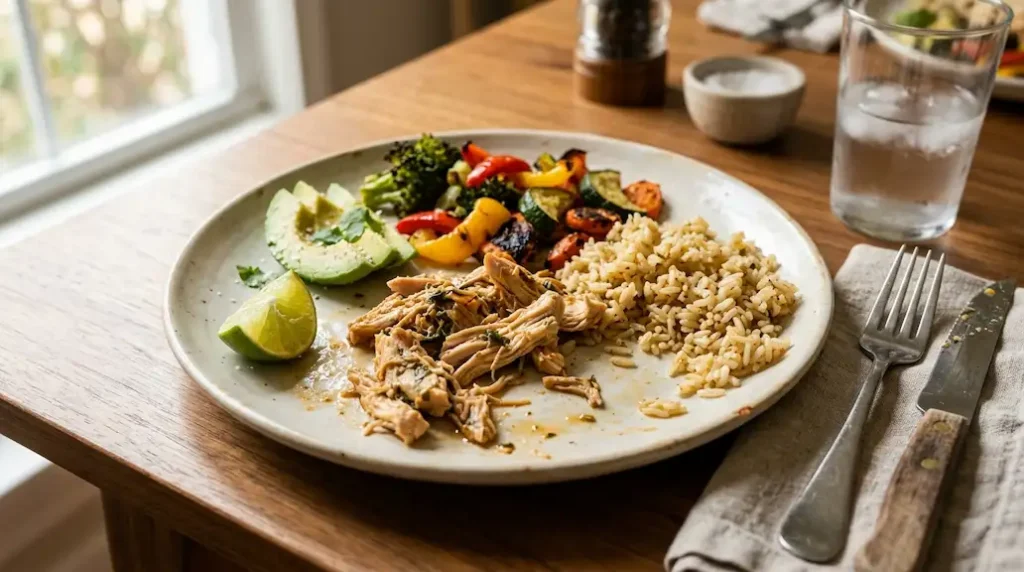
For a simple dinner bowl, combine shredded chicken with cooked rice, roasted vegetables, avocado, and a drizzle of sauce.
For a lighter meal, add the chicken to a crisp salad with tomatoes, cucumber, corn, and a creamy dressing.
A cold glass of iced tea, sparkling water with lemon, or lemonade works especially well with these casual weeknight meals.
Storage
Do not leave cooked chicken at room temperature for more than 2 hours. If the surrounding temperature is above 90°F, refrigerate it within 1 hour.
Transfer leftovers to an airtight container and refrigerate promptly. Cooked chicken is generally best used within 3 to 4 days when properly refrigerated.
For the best texture, store the chicken with a small amount of its cooking liquid. This helps protect the shredded strands from drying out.
Use shallow containers when possible so a large batch cools more quickly.
Freezing and Make-Ahead Tips
This recipe is excellent for make-ahead meals.
Let the cooked chicken cool promptly, then divide it into meal-sized portions. Place each portion in an airtight freezer container or freezer-safe bag. Press excess air from freezer bags before sealing.
Label each package with the date and amount. For best quality, use frozen shredded chicken within about 3 months.
Thaw it overnight in the refrigerator. If you need it sooner, reheat it directly from frozen in a covered skillet over low heat with a splash of chicken broth, stirring occasionally until hot.
Do not repeatedly freeze and thaw the same portion. Freeze in sizes you are likely to use for one meal.
Reheating Shredded Chicken
The stovetop is one of the best methods for preserving moisture.
Place the chicken in a skillet with 1 to 2 tbsp of chicken broth or water. Cover and warm over low to medium-low heat, stirring occasionally, until heated through.
You can also microwave it in a covered microwave-safe container. Add a splash of broth, cover loosely, and heat in short intervals, stirring between each interval.
The key is gentle reheating. High heat can quickly turn tender chicken into dry chicken.
Frequently Asked Questions
Can I make shredded chicken with chicken thighs?
Yes. Boneless, skinless chicken thighs work very well. They have more fat than chicken breasts, so the finished chicken is richer and often more forgiving if slightly overcooked.
How long does chicken take to cook for shredding?
For 2 lb of boneless chicken breasts cooked by this method, the cooking time is usually about 10 to 15 minutes after the broth reaches a gentle simmer. Thickness matters, so always verify that the thickest part reaches 165°F.
Can I use frozen chicken breasts?
For the most even results, thaw the chicken completely in the refrigerator before cooking. Frozen chicken can cook unevenly and makes it harder to season and judge timing accurately.
Is it better to shred chicken hot or cold?
Warm chicken is generally easier to shred. Let it rest for about 5 minutes after cooking, then shred it while it is still comfortably warm.
Can I shred chicken in a stand mixer?
Yes, especially when making a large batch. Use the paddle attachment on low speed and watch closely. Stop as soon as the chicken reaches the texture you want.
How do I keep shredded chicken from drying out?
Do not overcook it, and mix the shredded chicken with some of the warm cooking liquid. When storing it, keep it tightly covered and include a small amount of broth.
Can I make this shredded chicken ahead of time?
Absolutely. Refrigerate it for up to 3 to 4 days or freeze it in meal-sized portions for longer storage. It is especially useful for weekly meal prep.
What is the best way to shred chicken for tacos?
Use two forks to pull the warm chicken into medium-sized strands. Medium shreds hold sauces well without becoming too fine or mushy.
Can I season the chicken differently?
Yes. The base seasoning is intentionally versatile. Add chili powder and cumin for tacos, Italian seasoning for pasta, barbecue sauce for sandwiches, or lemon and herbs for a brighter flavor.
What temperature should chicken reach?
The thickest part of the chicken should reach 165°F. An instant-read thermometer is the most reliable way to check.
Notes
Chicken thickness affects cooking time. Use the thermometer rather than relying only on the stated cooking time. Keep the simmer gentle and do not discard all of the cooking liquid after shredding.
Storage
Refrigerate cooked shredded chicken in an airtight container for 3 to 4 days. Store with a small amount of cooking liquid to help maintain moisture.
Freezing
Freeze cooled chicken in meal-sized portions for up to about 3 months for best quality. Thaw overnight in the refrigerator before reheating.
Nutrition Disclaimer
Nutrition information is an estimate calculated from the listed ingredients and may vary based on the specific chicken, broth, oil, seasoning brands, and portion size used.
Final Thoughts
A good shredded chicken recipe should make life easier, and that is exactly what this one is designed to do. The chicken cooks in a seasoned broth, stays tender enough to shred, and can be turned into completely different meals throughout the week.
Once you make a batch, the possibilities are wide open. Keep it simple with rice and vegetables, tuck it into tacos, or turn it into sandwiches and salads.
And if you love cozy chicken dinners as much as I do, keep a marry me chicken soup recipe nearby for the next time you want something warm, creamy, and comforting.
If you make this recipe, leave a review and share a photo on Pinterest. Seeing how readers turn this chicken into their own weeknight meals is one of the best parts of sharing recipes.