
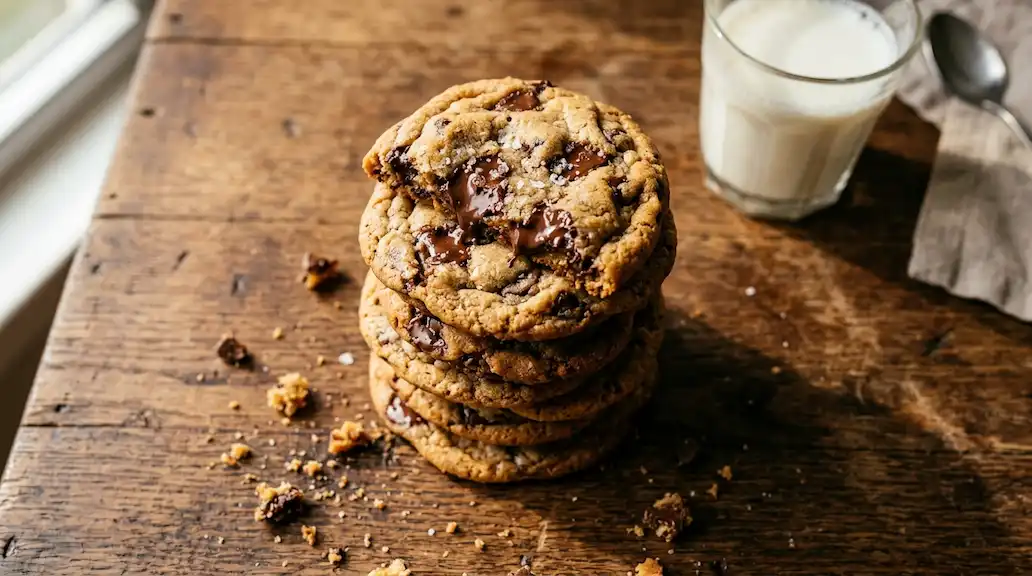
A classic toll house cookie recipe that delivers everything a great cookie should: buttery flavor, crisp golden edges, and soft, chewy centers packed with melty chocolate chips. This version fixes the common problems — spreading, dryness, and pale color — so every batch comes out bakery-quality.
- Prep Time: 15 minutes
- Chill Time: 30 minutes (recommended)
- Bake Time: 10 minutes
- Total Time: 55 minutes
- Servings: 24 cookies
- Calories (Estimated): 165 per cookie
Ingredients
- 2 1/4 cups all-purpose flour
- 1 teaspoon baking soda
- 1 teaspoon salt
- 1 cup (2 sticks) unsalted butter, softened
- 3/4 cup granulated sugar
- 3/4 cup packed brown sugar
- 2 large eggs
- 2 teaspoons vanilla extract
- 2 cups semi-sweet chocolate chips
- 1 cup chopped walnuts or pecans (optional)
Quick Instructions
- Whisk flour, baking soda, and salt together.
- Cream butter with both sugars until light and fluffy.
- Beat in eggs and vanilla.
- Mix in the dry ingredients just until combined.
- Fold in chocolate chips (and nuts, if using).
- Chill the dough for 30 minutes.
- Scoop onto a lined sheet and bake at 375°F for 9–11 minutes.
- Cool on the pan for 5 minutes before transferring to a wire rack.
Notes
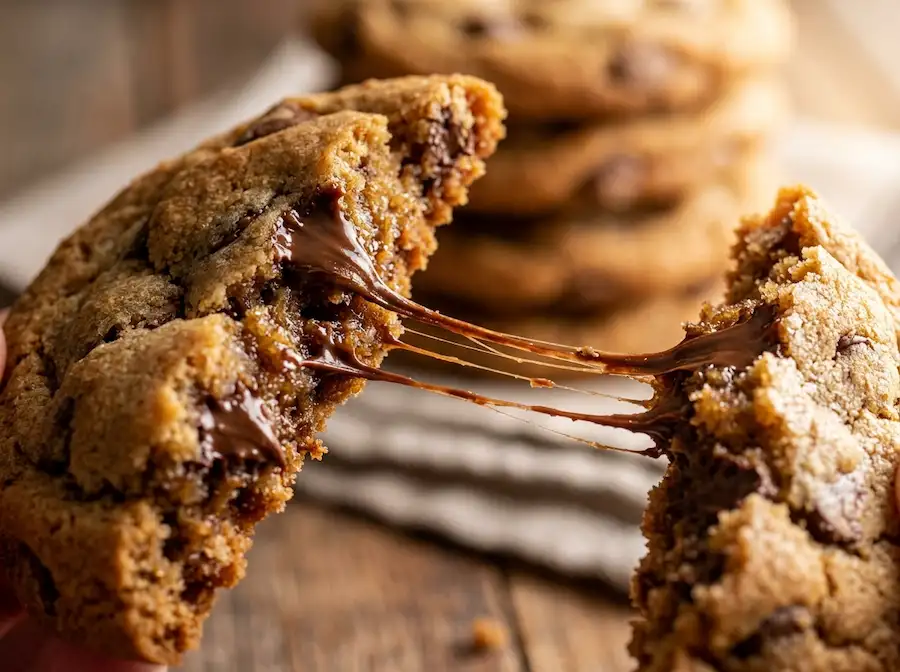
For the chewiest texture, pull the cookies out of the oven when the centers still look slightly underdone. They finish cooking on the hot pan.
Table of Contents
Why This Toll House Cookie Recipe Works
This toll house cookie recipe has stayed popular for one simple reason: it hits the exact texture most people crave in a chocolate chip cookie. The edges turn crisp and lightly caramelized while the middle stays soft, dense, and slightly underbaked in the best possible way. That contrast, plus real butter and good chocolate, is what separates a forgettable cookie from one people ask you to make again.
If you’ve ever pulled a batch out of the oven only to find flat, greasy, or cakey cookies, the fix usually comes down to a few small details — butter temperature, how long you mix, and how you measure flour. This guide walks through all of it, so your results are consistent every single time.
You’ll also find a full gluten free dessert recipe on the site if you’re baking for someone with dietary restrictions, along with plenty of other cookie-focused resources linked throughout this article.
What Makes Toll House Cookies So Popular?
The original recipe was created in the 1930s at the Toll House Inn in Massachusetts, and it became the template almost every chocolate chip cookie since has followed. The formula is simple: butter, two sugars, eggs, flour, and chocolate chips. What makes it endure is how forgiving and adaptable it is — you can bake it thin and crisp, thick and chewy, or somewhere in between, all from the same base dough.
Part of the appeal is nostalgia. Most people grew up with a version of this cookie, whether from a family recipe card or the back of a chocolate chip bag. This version keeps that familiar flavor but tightens up the technique for a more reliable, bakery-style result.
Why You’ll Love This Recipe
- Soft, chewy centers with crisp, golden edges every time
- No special equipment required — just a mixing bowl and a spoon
- Freezer-friendly dough for fresh cookies whenever you want them
- Easy to customize with nuts, sea salt, or extra chocolate
- Beginner-friendly steps with clear visual cues
Ingredient Notes
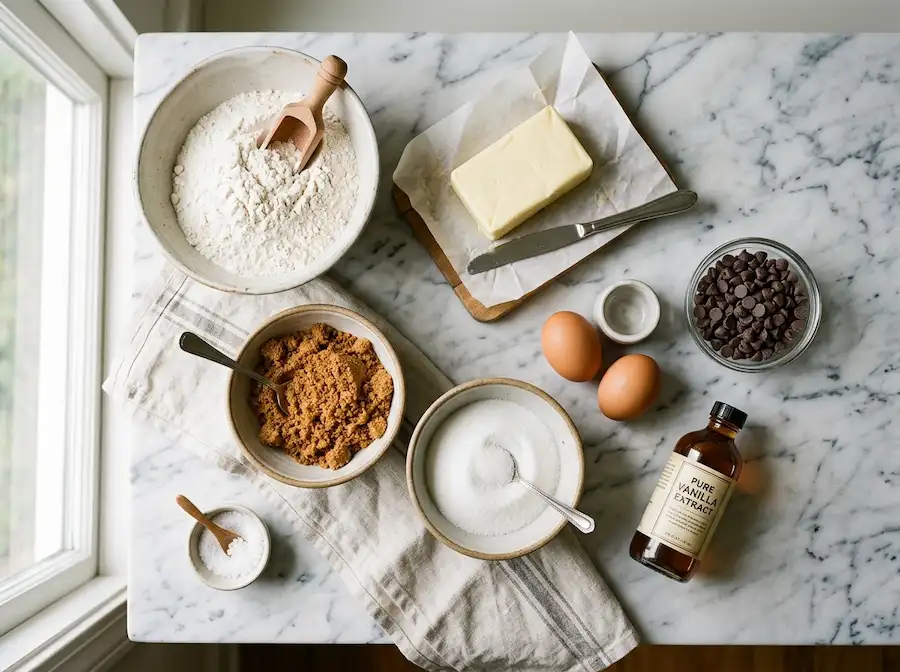
Butter temperature is the single biggest factor in how your cookies bake. Butter that’s too warm or melted causes cookies to spread thin and greasy. Softened butter, cool to the touch but easily dented with a finger, creams properly and traps air for a lighter texture.
Brown sugar vs. white sugar: Brown sugar adds moisture and a deeper, caramel-like flavor because of its molasses content, which is why this recipe leans slightly more on brown sugar than white. White sugar helps with crisp edges. Together, they balance chewiness and crunch.
Chocolate chips: Choose a chocolate you’d enjoy eating on its own. Semi-sweet chips hold their shape well during baking, while chopped chocolate bars create those beautiful melty pools throughout the dough.
Flour: Standard all-purpose flour works best. Spoon it into your measuring cup and level it off with a knife rather than scooping directly from the bag, which can pack in up to 25% more flour than the recipe intends.
Eggs: Use large eggs at room temperature so they blend smoothly into the creamed butter and sugar without seizing it up.
Vanilla extract: Pure vanilla extract makes a noticeable difference over imitation vanilla, adding warmth and depth to the overall flavor.
Baking soda: This is a leavening agent that also encourages browning. Make sure yours is fresh — baking soda loses potency over time and can lead to flat, pale cookies.
Salt: Regular table salt is fine, but a light sprinkle of flaky sea salt on top before baking adds a nice contrast to the sweetness.
Optional add-ins: Chopped walnuts, pecans, toffee bits, or a mix of chocolate types all work well folded into the base dough.
Substitutions: Salted butter can replace unsalted butter if you simply omit the added salt. Dark brown sugar can replace light brown sugar for a richer, more molasses-forward flavor.
Storage advice for ingredients: Keep butter refrigerated until about 45 minutes before baking, and store chocolate chips in a cool, dry place away from direct sunlight to prevent blooming.
Kitchen Equipment
- Large mixing bowl
- Hand mixer or stand mixer
- Measuring cups and spoons
- Cookie scoop (about 1.5 tablespoons)
- Baking sheets
- Parchment paper or silicone baking mats
- Wire cooling rack
Step-by-Step Instructions
Step 1: Whisk the Dry Ingredients
In a medium bowl, whisk together the flour, baking soda, and salt until evenly combined. Set this aside.
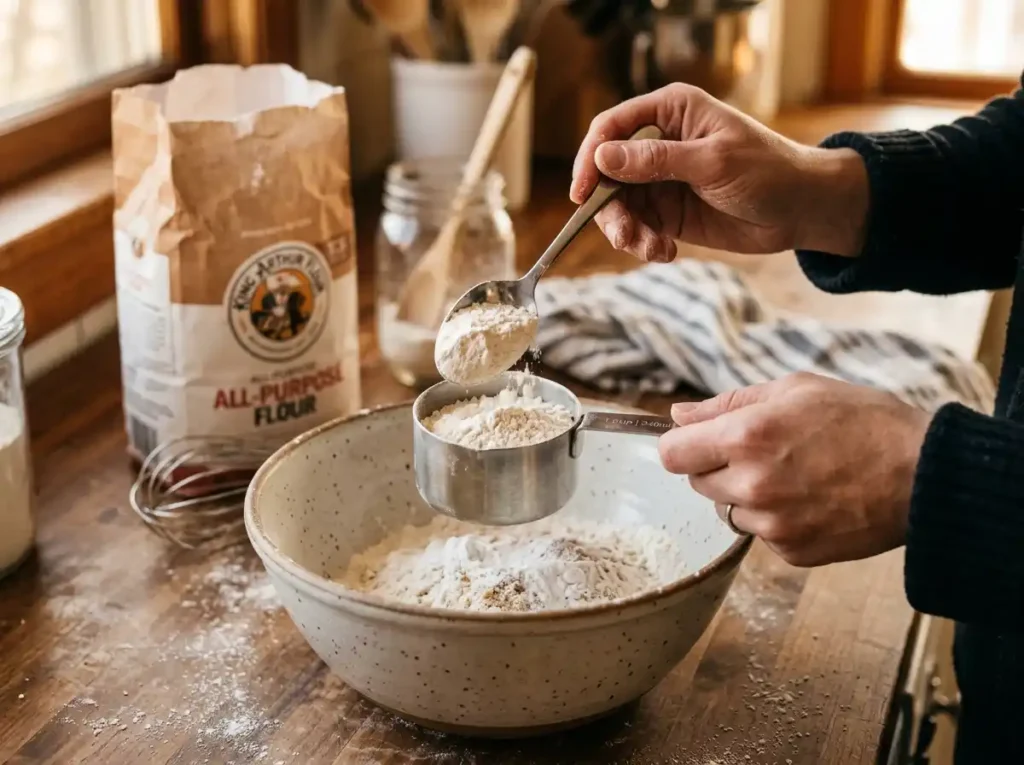
What to Look For: The mixture should look uniform in color with no visible streaks of baking soda.
Helpful Tip: Whisking the dry ingredients separately, rather than adding them one at a time to the wet mixture, helps distribute the baking soda evenly so you don’t end up with a bitter spot in one bite.
Step 2: Cream the Butter and Sugars
In a large bowl, beat the softened butter with the granulated sugar and brown sugar on medium speed for 2–3 minutes.
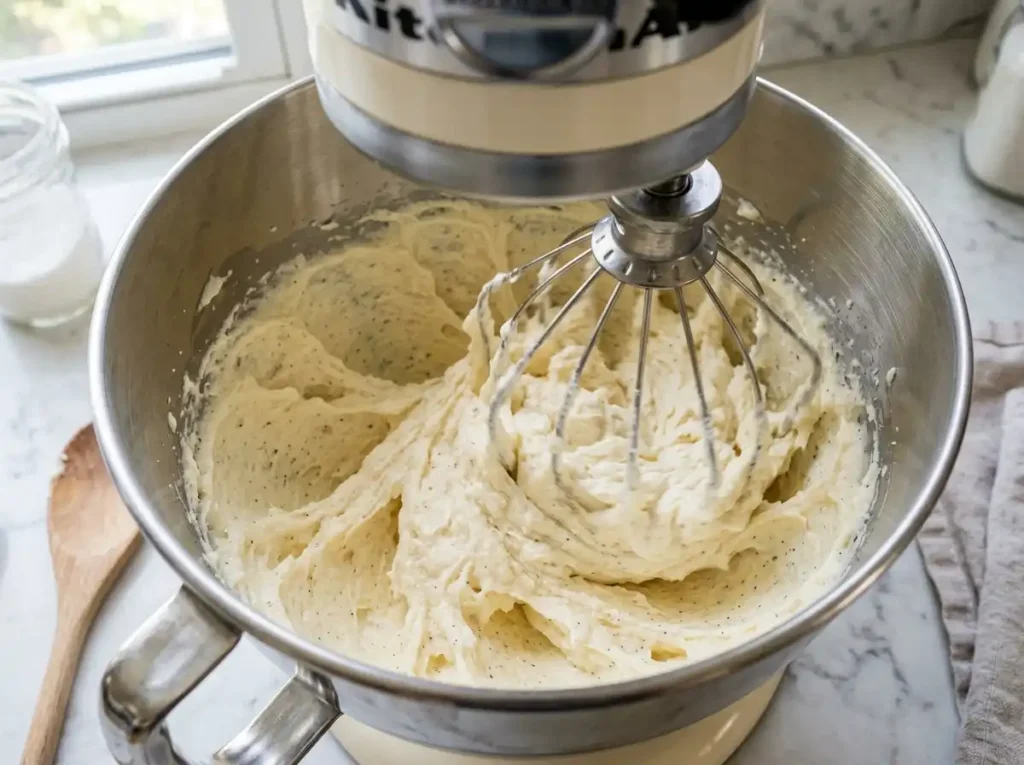
What to Look For: The mixture should turn noticeably paler and fluffier, almost like light frosting, and should cling to the beaters rather than sitting flat.
Helpful Tip: Don’t rush this step. Proper creaming incorporates air into the dough, which is part of what gives these cookies their tender crumb.
Step 3: Add the Eggs and Vanilla
Beat in the eggs one at a time, then mix in the vanilla extract until fully incorporated.
What to Look For: The batter should look smooth and glossy, with no streaks of egg visible.
Helpful Tip: Scrape down the sides and bottom of the bowl with a spatula to make sure everything mixes evenly, especially if you’re using a stand mixer.
Step 4: Combine Wet and Dry Ingredients
Add the flour mixture to the wet ingredients in two batches, mixing on low speed just until the flour disappears.
What to Look For: The dough should look thick, slightly stiff, and hold together when pinched — no dry flour pockets remaining.
Helpful Tip: Stop mixing the moment you no longer see flour streaks. Overmixing at this stage develops gluten and leads to tougher, less tender cookies.
Step 5: Fold in the Chocolate Chips
Using a spatula, gently fold in the chocolate chips (and nuts, if using) by hand.
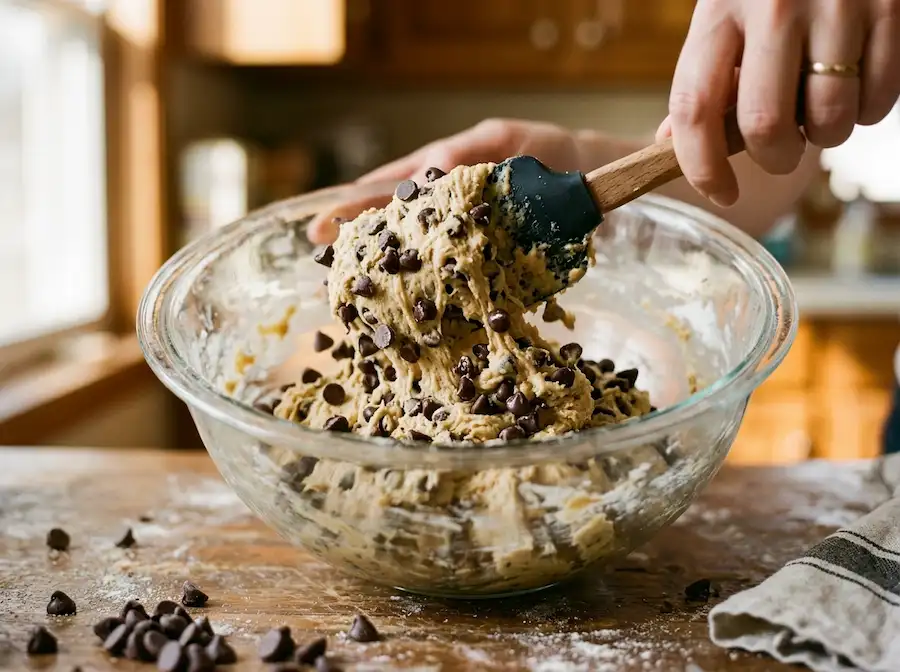
What to Look For: Chips should be evenly distributed throughout the dough rather than clumped in one section.
Helpful Tip: Save a small handful of chips to press onto the tops of the scooped dough balls before baking for that bakery-display look.
Step 6: Chill the Dough
Cover the bowl and refrigerate the dough for at least 30 minutes, or up to 24 hours.
What to Look For: Properly chilled dough should feel firm, not sticky, and hold its shape when scooped.
Helpful Tip: Chilling solidifies the butter again, which slows spreading in the oven and results in thicker, chewier cookies. If you’re short on time, even 20 minutes in the freezer helps.
Step 7: Portion the Dough
Preheat the oven to 375°F. Using a cookie scoop, portion the dough into balls of roughly 1.5 tablespoons each, spacing them about 2 inches apart on a lined baking sheet.
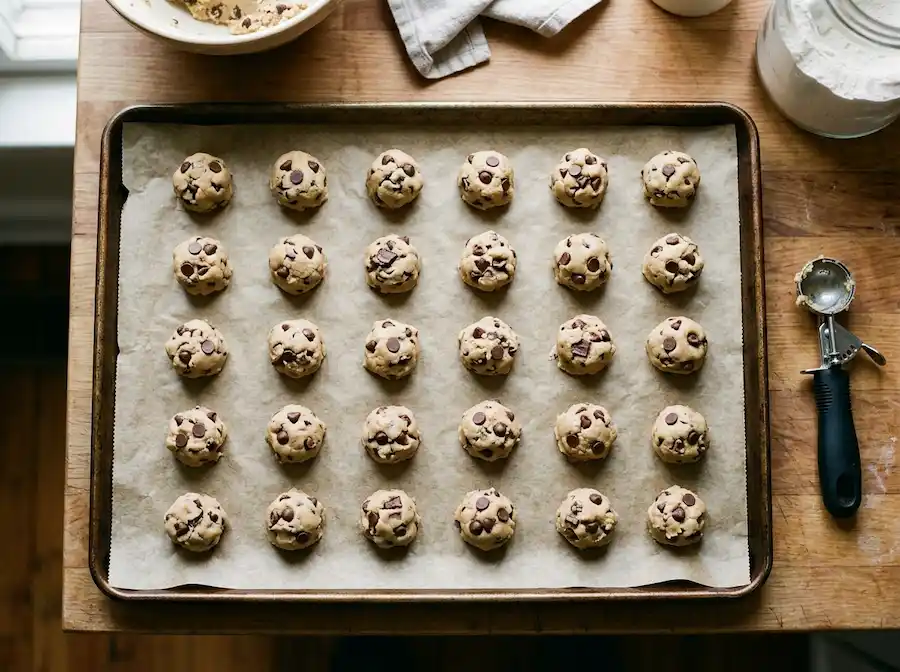
What to Look For: Dough balls should be similar in size so the whole batch bakes evenly.
Helpful Tip: Roll each portion briefly between your palms for a smooth, rounded shape that bakes up with an even dome.
Step 8: Bake
Bake one sheet at a time for 9–11 minutes, until the edges are golden brown but the centers still look soft and slightly underbaked.
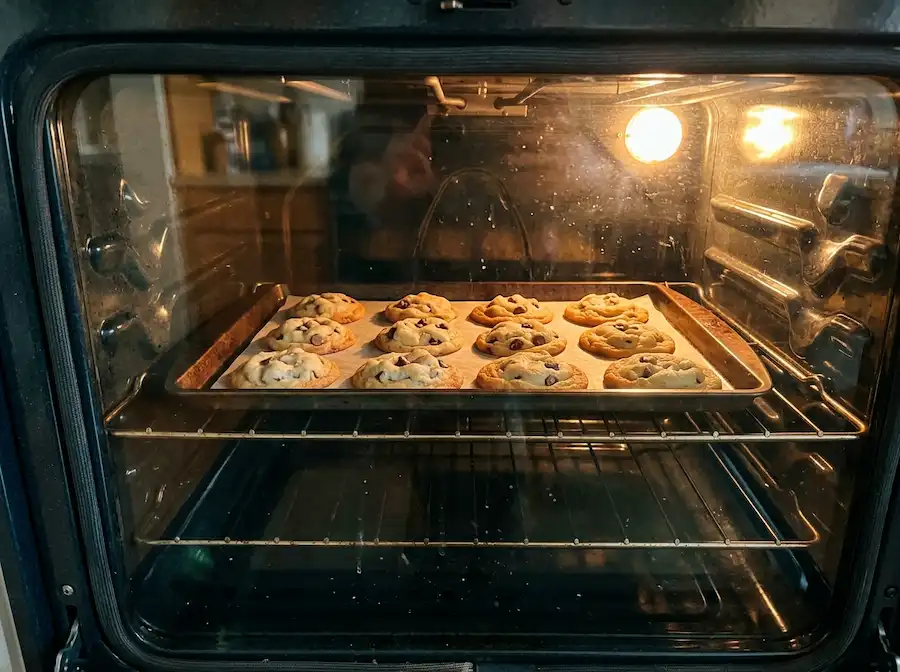
What to Look For: The edges should look set and lightly golden, while the middle looks puffed and pale, almost like it needs another minute.
Helpful Tip: Resist the urge to bake until the centers look fully done — they’ll continue cooking from residual heat once out of the oven, which is the secret to that soft, chewy center.
Step 9: Cool for Chewy Centers
Let the cookies rest on the hot baking sheet for 5 minutes before transferring them to a wire rack to cool completely.
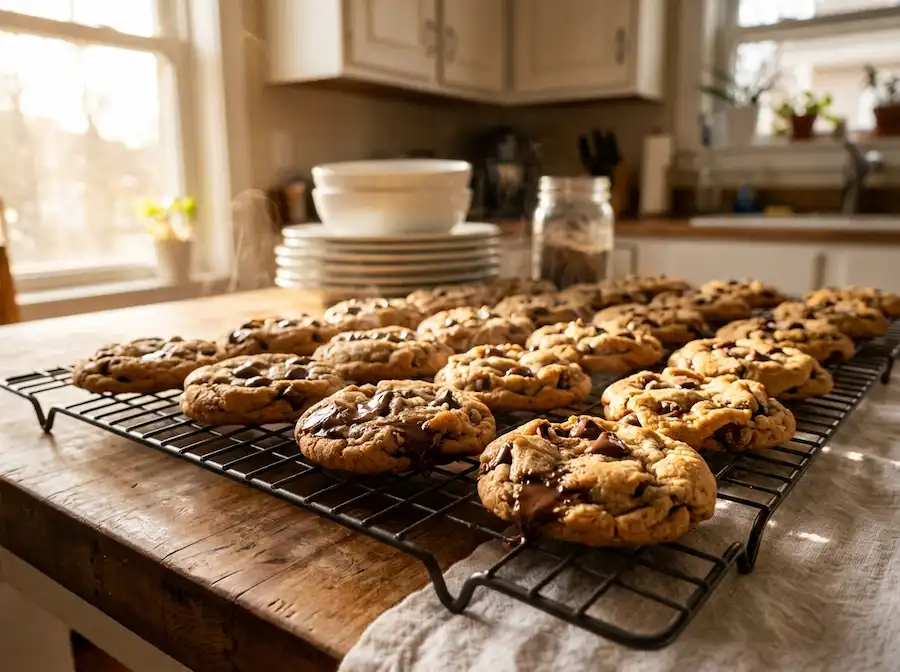
What to Look For: The cookies should firm up slightly around the edges while staying soft in the middle when you touch the center.
Helpful Tip: Skipping this resting period and moving cookies too early can cause them to break apart, since the structure is still setting.
Expert Baking Tips
- Weigh your flour if you have a kitchen scale — 1 cup of all-purpose flour should weigh about 120 grams for the most accurate results.
- Use room-temperature eggs so they blend smoothly into the butter mixture without causing it to look curdled.
- Chill the dough for thicker cookies that hold their shape instead of spreading thin.
- Slightly underbake your cookies and let carryover heat finish the job for the softest centers.
- Use a light-colored baking sheet rather than a dark one, which can cause the bottoms to overbake and burn.
- Rotate your baking sheet halfway through baking if your oven has hot spots.
- Press extra chocolate chips on top of each dough ball before baking for a picture-perfect finish.
- Don’t overcrowd the tray — cookies need room to spread evenly without merging together.
- Let butter soften naturally at room temperature rather than microwaving it, which can create warm spots that mess with texture.
- Add a pinch of flaky sea salt right before baking to balance the sweetness and boost flavor.
- Store dough in the fridge for up to 3 days so you can bake a few fresh cookies at a time instead of the whole batch at once.
- Use an oven thermometer to confirm your oven’s actual temperature, since many run hotter or cooler than the dial suggests.
Common Mistakes
Overmixing the dough: This develops gluten and results in tough, dense cookies rather than tender ones. Mix only until the flour disappears.
Using too much flour: Scooping flour directly from the bag packs it down and adds extra flour without you realizing it. Always spoon flour into the measuring cup and level it off.
Butter that’s too warm: Melted or overly soft butter causes cookies to spread into thin, greasy puddles. Butter should be soft enough to dent with a finger but still cool.
Overbaking: Cookies continue cooking after leaving the oven. Pull them out while the centers still look slightly underdone.
Skipping the chill time: Warm dough spreads faster in the oven, leading to flat, thin cookies instead of thick, chewy ones.
Incorrect oven temperature: An oven running too hot or too cool changes baking time and texture significantly. An oven thermometer helps you bake with confidence.
Crowding the baking sheet: Cookies placed too close together can spread into each other, creating uneven shapes and edges that don’t crisp properly.
Cookie Texture Secrets
The ratio of brown sugar to white sugar plays a bigger role in texture than most people realize. More brown sugar means more moisture and chew; more white sugar means crisper edges and more spread. This recipe’s balance leans toward chewy without sacrificing that classic crisp edge.
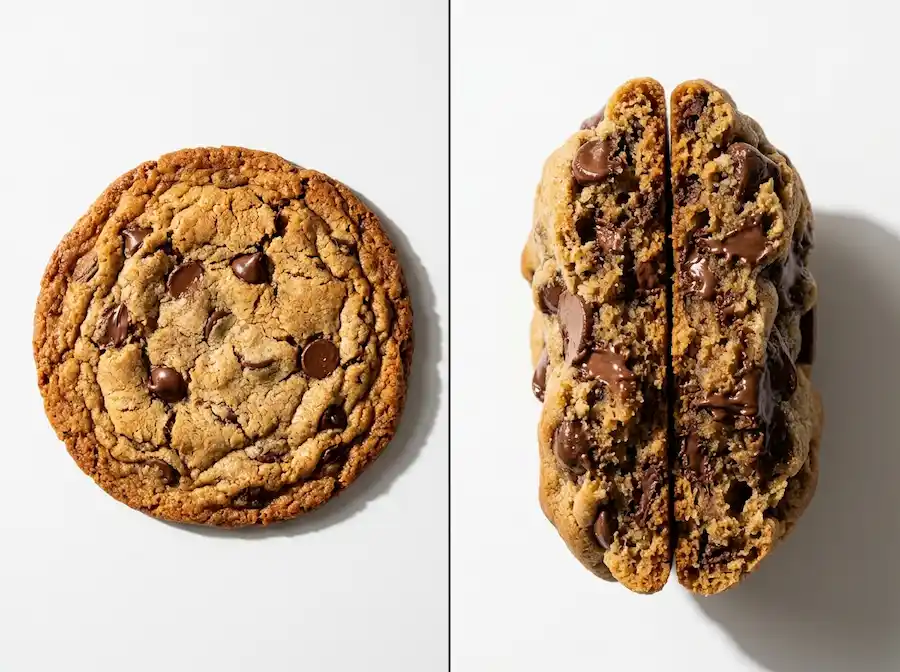
Chilling the dough matters just as much as the ingredients themselves. Cold dough spreads more slowly in the oven, which gives the edges time to set and brown before the center has a chance to flatten out completely.
Easy Variations
Double Chocolate: Replace 1/4 cup of the flour with unsweetened cocoa powder for a rich, brownie-like cookie.
Walnut Version: Fold in 1 cup of chopped walnuts along with the chocolate chips for extra crunch.
Pecan Version: Swap walnuts for chopped pecans and add a light drizzle of maple glaze after cooling.
Sea Salt Version: Sprinkle flaky sea salt on top of each cookie right before baking for a sweet-and-salty finish.
Mini Cookies: Use a 1-teaspoon scoop and reduce baking time to about 7 minutes for bite-sized treats.
Jumbo Bakery Cookies: Use a 1/4-cup scoop and bake for 13–15 minutes for oversized, bakery-style cookies with extra chewy centers.
Storage and Freezing
Room temperature: Store baked cookies in an airtight container for up to 5 days. Adding a slice of bread to the container helps keep them soft.
Refrigerating dough: Raw dough keeps well in the refrigerator for up to 3 days, covered tightly.
Freezing cookie dough: Scoop dough into balls, freeze on a tray until solid, then transfer to a freezer bag for up to 3 months. Bake straight from frozen, adding 1–2 extra minutes.
Freezing baked cookies: Cool completely, then freeze in a single layer before stacking in a freezer-safe container for up to 3 months.
Best reheating method: Warm cookies in a 300°F oven for 3–5 minutes to refresh that just-baked softness and melty chocolate.
Serving Suggestions
These cookies pair perfectly with a cold glass of milk or a warm cup of coffee, letting the buttery, chocolatey flavor shine. For holidays, arrange them on a tiered platter alongside other classics like a nestle chocolate chip cookie recipe or a simple butter cookie recipe for variety on a dessert table.
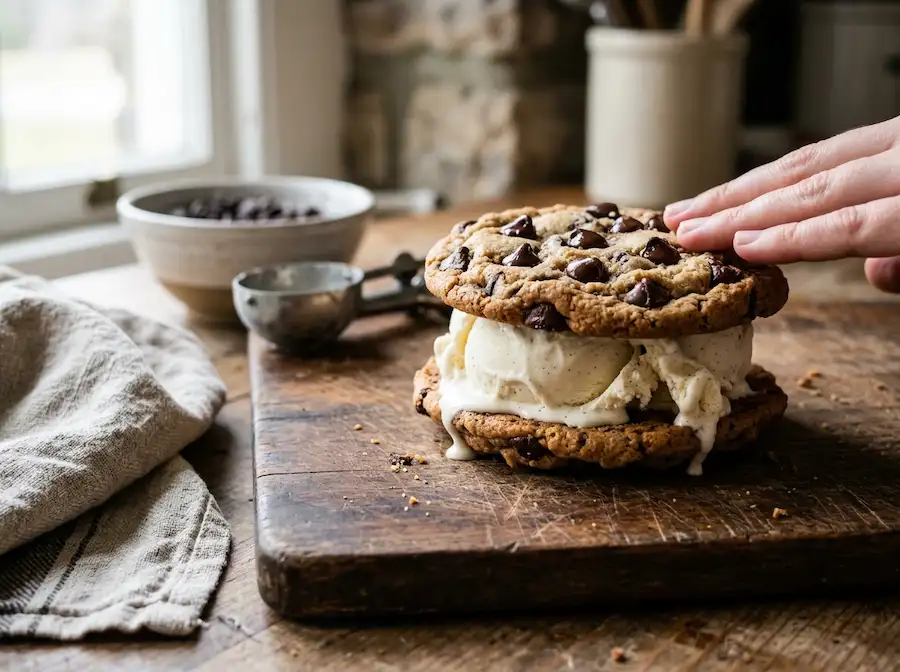
They also make an excellent base for ice cream sandwiches — simply place a scoop of vanilla or coffee ice cream between two cooled cookies and press gently together.
Notes
For thicker, bakery-style cookies, chill the dough for a full 24 hours before baking. This deepens the flavor and further reduces spreading.
Nutrition Disclaimer: Calorie and nutrition information is estimated and may vary based on specific ingredients and brands used.
Frequently Asked Questions
Why did my toll house cookies turn out flat?
Flat cookies are usually caused by butter that was too warm or dough that wasn’t chilled before baking. Chilling the dough for at least 30 minutes helps the cookies hold their shape in the oven.
Can I make the dough ahead of time?
Yes. The dough can be refrigerated for up to 3 days or frozen for up to 3 months, making it easy to bake fresh cookies whenever you want them.
Why are my cookies dry or crumbly?
This is often caused by using too much flour or overbaking. Spoon and level your flour instead of scooping, and pull cookies out while the centers still look slightly soft.
Do I have to chill the dough?
Chilling isn’t strictly required, but it significantly improves texture by preventing excess spreading and deepening the overall flavor.
What’s the best way to store leftover cookies?
Store cooled cookies in an airtight container at room temperature for up to 5 days, or freeze them for longer storage.
Can I use salted butter instead of unsalted?
Yes, simply omit the added salt in the recipe or reduce it slightly to avoid an overly salty result.
How do I know when the cookies are done baking?
Look for golden edges with centers that still appear soft and slightly underbaked. They’ll continue to set as they cool on the pan.
Final Thoughts
A great toll house cookie recipe comes down to a handful of small, controllable details: butter temperature, careful measuring, chilling the dough, and knowing exactly when to pull the tray from the oven. Once you’ve made this recipe a couple of times, you’ll start recognizing the visual cues instinctively, and every batch will come out with that same soft, chewy center and crisp golden edge people keep coming back for.